

After I made the Christmas Gift Tags, I decided I needed some all occasion gift tags. I also realized I needed to clarify some directions from that Christmas tutorial about the fabric softener sheets.
I had gotten the idea for these tags from different Junk Journalists that first made master collage boards to create tags. I found Teal and Tattered idea to turn over her collage board and cutting from the back side so she wouldn't be influenced by any layout. Then it seemed fun to turn over the cutout tags for a reveal.
******************
Tuesday Tutorial
******************
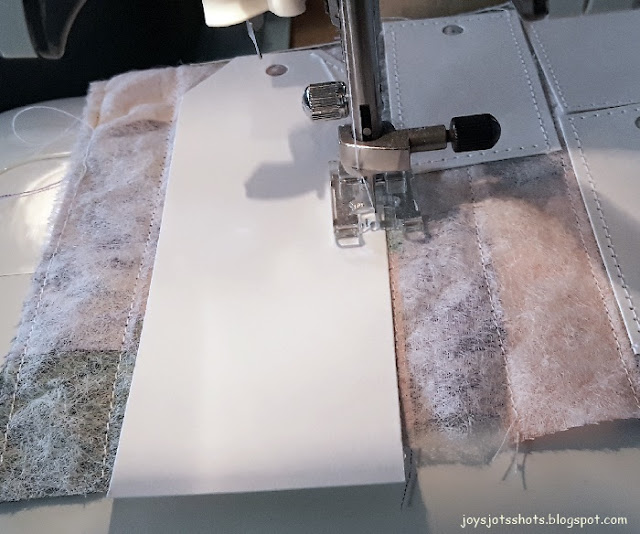
Used dryer sheets. Warning! Do not iron these sheets unless you are using an old iron for this purpose only. A residue will be left on iron. If you use an ironing sheet, the residue will melt through fabric and again leave a residue on your iron as well as on your ironing board. If you use a teflon sheet, and later iron on that same sheet, your iron will pick up that residue.
Instead of dryer sheets
you might also use as a foundation instead of dryer sheets:
*scrap paper
*junk mail paper/envelopes
*scraps of embroidery stabilizer
*if you have other ideas, please leave a comment below
If a foundation isn't used and fabric is sewn directly on the cards, then stitching lines will show on the writing surface side of the tag. (See at the bottom of this post.)


I decided to work from right to left.
You work whichever orientation works best for you.

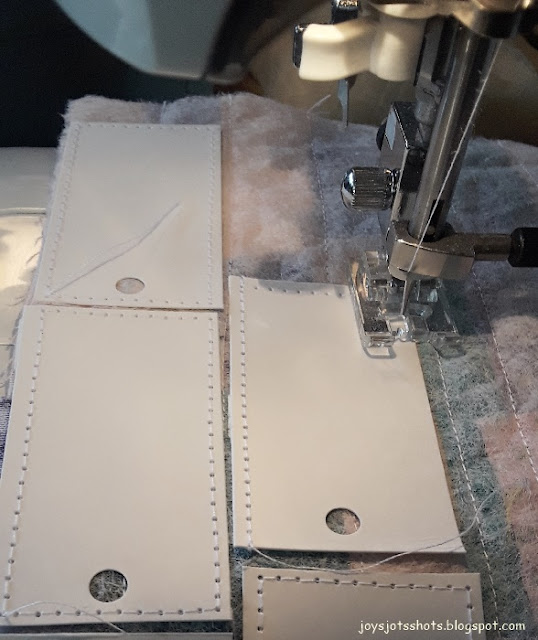
Raw edges are shown.
Don't worry about stitching across each end of each piece.
 Notice top of second row from left.
Those pieces were cut off the bottom of the first few rows.


but I did buy this crease/cutter board
 Do NOT use your fabric scissors to cut apart boxes.
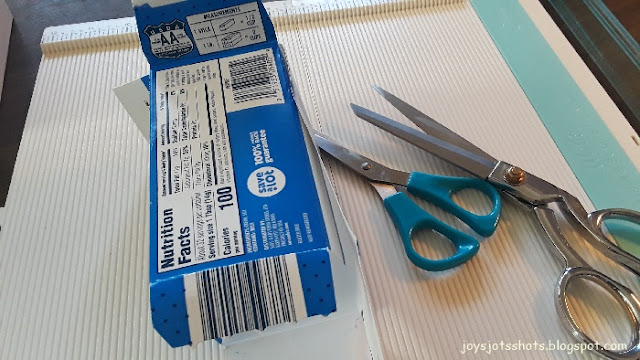 All boxes do have a seam on the long side.


For Method 2, I let the boxes guide the size of the tags.
They usually come out anywhere between 2 to 3 inches long and 1 to 2 inches wide.
I don't measure.
For example, the bottom of this box is a natural size tag.
The tags are laid on the large piece of fabric to utilize the fabric space as best as possible. You'll see below.
 From today's box.
The gold tagboard was a part of the boxing material in a box.
They will be left as is, because the other side is white for writing.

Turn over the collage fabric so you can see the dryer sheet side.
 Lay out tags on the back side in a way that would make the most use of the collage fabrics.
 Later the bottom of this tag will be trimmed off.

I'll probably use the larger tags in a journal or as a bookmark.


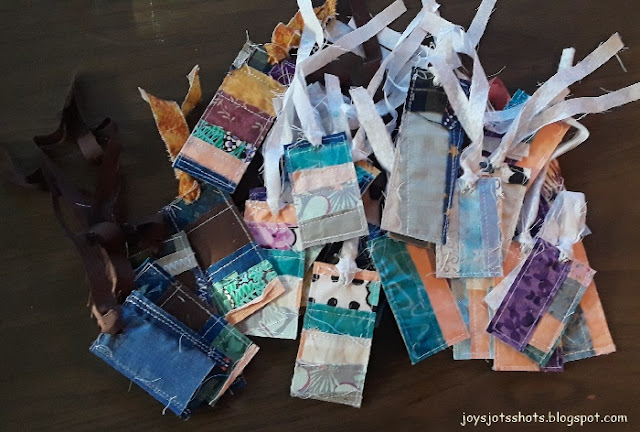
I cut the cards apart with fabric scissors and mostly with a rotary cutter on a mat.
You can see the leftover scraps.
They can be used on the next project or
an all occasion card.

I wait to turn all over at the same time.
Now for the BIG reveal!

It's fun to see how the strips land on the cards.
If these strips had been sewn directly onto the cards,
can you see how stitching would interfere
with the writing side of the card?


use patterned fabric,
for surprise turnout.


What will the tags look like if pieces aren't sewn on a foundation?
Take a look below.


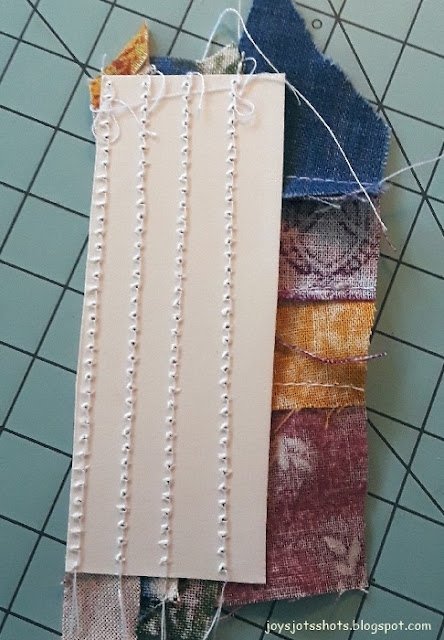
This is what the writing space on the tag will look like
when scraps are directly sewn on the card.
I thought I was using "ugly" scraps,
but atfer I trimmed it and turned it over,
I rather liked it.

I'll use it for a bookmark.
There is a post coming later about a couple of other tags
made without foundation
but so the tag has writing space.
Very time consuming.
These look like fun to make Joy. We don't use dryer sheets because we very rarely use a dryer (and besides, DH is allergic to anything with scent in it). Your tags are great for the ever-growing pile of fabric scraps that we all seem to have.
ReplyDeleteWhat a great idea. We don't use dryer sheets, but I recently got a bouquet of flowers wrapped in that fabric tissue paper that would work for this. Mine is purple, but I've seen it in other colors too. Thanks for sharing!!!
ReplyDeleteSounds like great use for your fabric tissue paper! I'll be checking out your blog to see what you create Lorraine.
Delete