Friday, May 31, 2013

Teaching Beginners How to Sew- Lesson 4- Coaster

Lesson 3 required exacted straight stitching by sewing a straight line equal distance apart.  At the end of the lesson, we said we would repeat lesson 3 for more practice.  However, my student helped create this lesson when her "creative designer" side kicked in.  She asked if we could do a circle instead of a square.  Also, while picking out fabrics she found the elephant and wanted to know if we could use it.

Those 2 requests gave us the objectives for Lesson 4:  Stitching exact curves.


~~ Sewing Lesson 4 ~~

*Layer the fabrics as in Lesson 3.
*Pin the elephant to the center.
*Use a narrow, long zig-zag around the outer edge of the elephant, taking out pins as you stitch.
Don't worry about being too exact, as curved stitches across the elephant will help tack it down.

 *Start curve (circle) stitching wherever you like.  (We intended to start in the center and do stitching equal distance apart, but it didn't happen.)  Try to sew in a circle, lines equal distance apart, manipulating fabric so as not to have to stop and pivot and turn. PRACTICE.
*Zig-zag around the outer edge.  Try to use a denser stitch than used in Lesson 3.
 My student decided to use her piece as a coaster in her bedroom.  I loved the creative aspect of her work, and the self-esteem and pride she acquired from "her" project.


Sharing at several Linky Parties.
Thanks to the FREE programs:
possibly used for this post
GIMP for cropping & other digital effects
 Photoscape for downsizing & watermarking photo
PicMonkey creating collages used on this page

Thursday, May 30, 2013

Remembering the Beauty of the 400 Mile Yard Sale

Shakertown Barn between Lexington & Harrodsburg

A tradition is upon us.  The first full weekend in June is when the 400 Mile Yard Sale is held.  It occurs on HWY 68 starting in Maysville, KY on the Ohio River and ends in Paducah, KY on the Ohio River.  The highway takes a southerly swoop down through Ky.  I think one reason I enJOYed "Yard Sale-ing"  HWY 68 so much last year was the beauty. 
The section between Paris and Maysville, KY does have some breathtaking scenery, but the highway between Lexington and Harrodsburg, KY has so many majestic and/or historical homes that seem they could almost speak their life.

@ Perryville (above)

(Below) Between Bowling Green and Hopkinsville, KY, a bigger, better highway was built just outside small towns, making them quieter and very quaint.
Then the land flattens out into awesome farmland and you think you are in Illinois. 
Fresh cut wheat fields have the makings of an artistic design.
Since Sunday is not a good day for "Yard Sale-ing" in the Bible Belt, and the end of our trip last year was a bit slight, we plan this year to start in Paducah and travel south and then the new extension @ Aurora, KY that was added last year to Paris, TN (which is not HWY 68)- for the beauty of course & more junk bargains.
And, we will still have our Angel traveling with us.
Lord willing.

See our Yard Sale trip from Paris, Ky to Paducah, Ky last year here.
See our treasures bought last year yard sale-ing on HWY 68 here.


Sharing at several Linky Parties.
Thanks to the FREE programs:
possibly used for this post
GIMP for cropping & other digital effects
 Photoscape for downsizing & watermarking photo
PicMonkey creating collages used on this page


Tuesday, May 28, 2013

Wordless Wednesday #53 ~ Brookgreen Garden Statues


If you enJOYed these shots, then I highly recommend that you visit & support Brookgreen Gardens @ Myrtle Beach, SC someday, and don't forget to take your camera for some Wordless shots.
Thanks to the FREE programs:
possibly used for this post
GIMP for cropping & other digital effects
 Photoscape for downsizing & watermarking photo
PicMonkey creating collages used on this page


Sunday, May 26, 2013

Sunday Best ~ Brookgreen's Poppies


Sharing at several Linky Parties.
Thanks to the FREE programs:
possibly used for this post
GIMP for cropping & other digital effects
 Photoscape for downsizing & watermarking photo
PicMonkey creating collages used on this page
 
 
Wow!  I haven't done a Sunday Best shot since last October and those weren't even my shots!

Thursday, May 23, 2013

Teaching Beginners How to Sew- Lesson 3- Pot Holder


Lesson 2 was to help the Beginning Sewist get used to the speed and feel of the sewing machine.  This lesson helps the Beginner to learn to use guides on their sewing machine (the pressure foot edge) to sew straight lines and to pivot (turn corners without removing the piece from the machine).


~~ Sewing Lesson 3 ~~

 For this project, you can probably again go to your waste scraps, and cut out two 6 inch or larger squares. They can be different fabrics. You will also need a 6 inch or larger square of some kind of fabric for the batting in between the layers as a heat barrier.  Don't use anything very think for this practice project as too much bulk will be a bit challenging for a Beginner.  We used a felt, but if you can find an old ironing board pad, that would have more heat resistant effect.

Sandwich these squares together with the right side of the fabric outward.  Yes, raw edges all around for this project.


*Show your Beginner how to use a little geometry to determine the center of this square.  Fold the square in half matching opposite corners and press fold (diagonal) with iron.  Then fold in half matching the other opposite corners and press fold.  Where the ironed folds cross is the center.

*Use about 4 quilting pins to hold the pieces together.

*Set the machine for regular stitch length.  Sew along pressed fold lines.  After the 2 lines are stitched, the pins can be removed.

After this pot holder was made, the foot is positioned for demonstration
* Begin the "echo" stitching at the middle point, about where the stitch lines cross. Stitch about 1/4 inch (width of left side of pressure foot to needle).

*Pivot- leave needle down, raise pressure foot, turn fabric 90° left (toward center), lower pressure foot, continue sewing.

*Continue practicing guiding the edge of the pressure foot along the previous stitch line, going past the end of each line about 1/4 inch before pivoting.  This provided a lot of practice for remembering to lower pressure foot before sewing.

*Continue pivoting and stitching lines until you get to as close to the outside edge as possible.
Notice the different fabric used on the other side.
*Go one last round on the outside edge with a wide zig-zag stitch to finish the edges.  Note in the picture it is not a satin (thick) stitch.  You choose the density you want.
In the end, the rows of stitching may not be exactly equal distance apart.  Doesn't that take practice?
We decided to make another for the next lesson if she doesn't have the chance to practice at home before the next lesson.  A place mat could be made, but for a young person, they may get bored and need a smaller project such as this pot holder.

Sharing at several Linky Parties.
Thanks to the FREE programs:
possibly used for this post
GIMP for cropping & other digital effects
 Photoscape for downsizing & watermarking photo
PicMonkey creating collages used on this page


Wednesday, May 22, 2013

Wordless Wednesday #52 ~ Grand Daughter Ball Trip

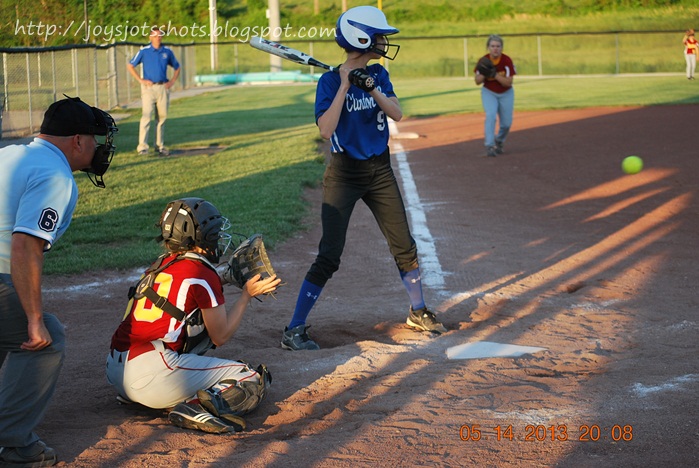
 My Grand Daughter's high school ball schedule said she played in neighboring counties in the southern part of the state on Tuesday and Thursday.  So we took off for a 6 day trip to end @ Mother's.  Kentucky is beautiful no matter where you go, and it's not all horse country like some think. Here are some shots that need no words.


 Yep, my Grand Grand Daughter.  She can hit and She's the catcher.  A sophomore.


We ended up hanging around Mother's an extra day to go to the District Tournament.
Congratulation Katy for making the 15th District Ball Team!!!!
We spent a relaxing Wednesday at Cumberland Lake Lure Lodge.
*View from our balcony*

Thanks to the FREE programs:
possibly used for this post
GIMP for cropping & other digital effects
 Photoscape for downsizing & watermarking photo
PicMonkey creating collages used on this page

Tuesday, May 21, 2013

Old Brings New Lamp- Recyling Parts

When I got to my Mother's last week, I found out she had been on a runaway scooter and broke her favorite, nice crystal lamp.  It had been put in the garbage, but those of you that know me, I had to see if I could rescue it. I retrieved it from the garbage, and this is what I found.
I sent Mr. G after some super glue thinking I could glue the glass back together.
I soon found out that major pieces of glass were missing, and didn't want to go through other garbage bags of glass slivers to recover to only have small pieces missing.  After all, this wasn't CSI.
HINT: Whenever I take apart a lamp, I lay out the pieces in the order I took them off the lamp, because I have to put it back together in the reverse order. 
So I looked around the garage where I was working to see what I could use.
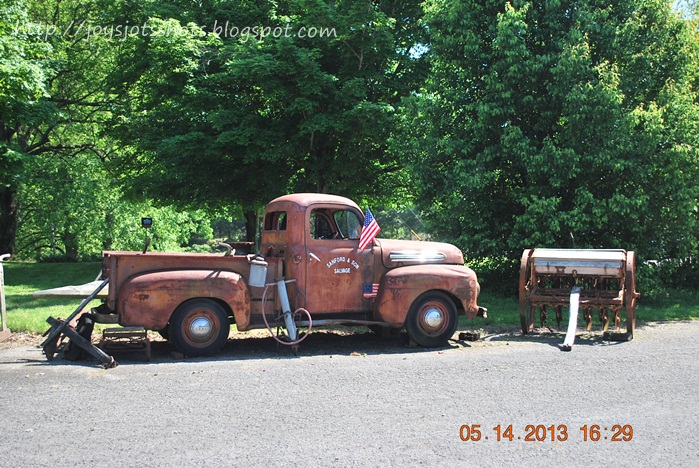
We all love these kinds of garages to satisfy our "Create Mood."
Right on the old metal shelf (You all remember getting these with green stamps?) I found 2 full cans of almond white spray paint.
It was so nice and handy to be able to use Dad's tools from his tool bench that Mr. G had reorganized about a year ago.  Super easy to find the tools I needed.

Results:
 My Mother said it looked like it belonged there.
I so value my Mother's compliments.
We all know how expensive lamps can be, so I was glad I saved a bit of money.

btw, the super glue didn't go to waste.  I used it to mend the lamp shade.

Sometime during the2 weeks it took me to return,
My sister replaced the lamp with a new one.
Oh well. 

Thanks to the FREE programs:
possibly used for this post
GIMP for cropping & other digital effects
 Photoscape for downsizing & watermarking photo
PicMonkey creating collages used on this page