After the receiver gets this Christmas card, they can cut out the ornament and hang it on a tree.
********************************
Cut card stock in half for 2 cards.
Cut out a 3 inch circle for a pattern.
Place the pattern on the front of the card in position desired
Place fabric over pattern.
Use a water soluble or heat sensitive pen to trace the circle.
To make the hanger of the ornament,
another pattern of your choice can be used.
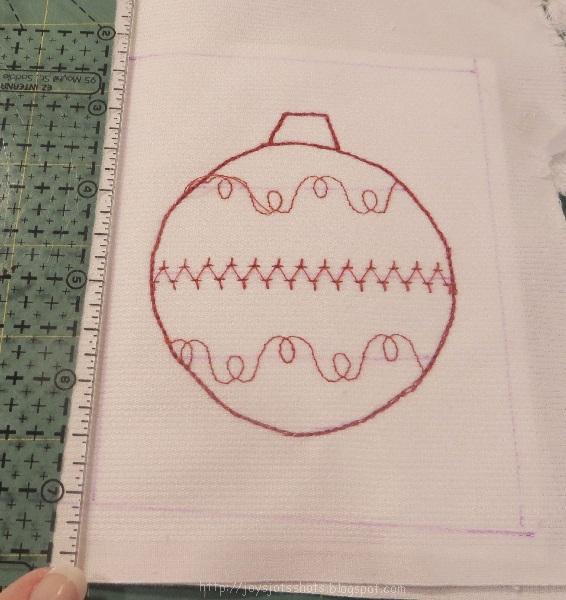
Start stitching in the position shown.
A triple stitch was used here, which is 2 stitches forward, 1 back.
Once around the circle, proceed to stitch the
hanger area of the ornament.
Choose stitches to decorate the ornament.
Making the back of the ornament.
Using the circle pattern,
draw circle on another piece of fabric that will go on the back of the front of the card.
Back the circle with some stabilizer from your scrap pile.
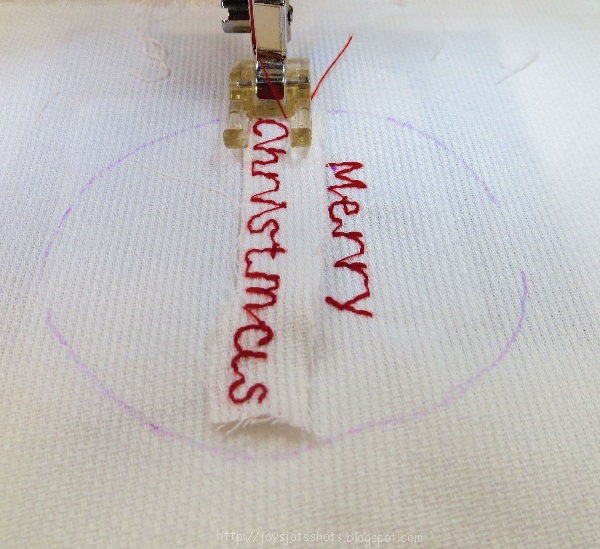
Use templates of the words "Merry Christmas" as seen above
to aid in placement of wording on the circle.
Then stitch the words.
(Do not stitch on the template.)
AFTER words are stitched,
place the untrimmed "Merry Christmas" circle fabric
on the back of the front of the card.
The fabric should be larger than the card &
will be trimmed down to card size later.
Place wording over the circle already stitched.
To attach the "Merry Christmas" circle,
stitch over the front ornament with a single stitch
around the previous stitched circle.
Do not stitch from the back, which would be done blindly.
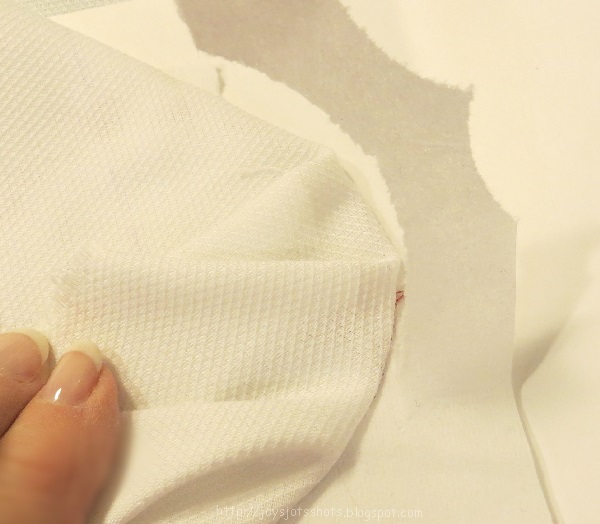
Remove stabilizer used on back of front of card.
Fold fabric back along the edge of the card,
using ruler and water soluble marker, mark line 1/4 inch from
all 4 edges then top stitch all 4 sides.
Folding fabric along edge helps to mark the 1/4 inch along the edge.
Stitch along 1/4 inch marked line through all layers.
Trim edges with pinking sheers.
Trim all threads.
Stitch gold cord through the card as shown.
Tie at the top.
An envelope can be made from 1 sheet of paper.
***
Hope your receivers enJOY the ornament from this card.
***********************************************
**********************************************
Info about making an envelope
The envelope can be made from a template using one sheet of paper that
works perfectly with this "half page" card. Just do a web search. Some
are PDF files. However some are jpeg (picture files) and if so, right
click on the picture & download as an image which will print on a
full sheet of paper. Use that as a template to trace around, so
printer ink doesn't need to be used every time you make an envelope. No
resizing should be needed to print. I used the ruler & rotary
cutter to cut out 6 at a time. Use a glue stick to hold. (info updated 4/21/18)
***************************
Thanks to the FREE programs: