Thursday, August 31, 2017

Thoughtful Thinking Thursday #105 ~ Is it Ever too Late for a Graduation Card

 The new school year has already started here.
I've still yet to honor someone who graduated this past May.
 I made this card a couple of weeks ago,
met up with the student's Grandmother,
but STILL forgot to take the card to her!
My motto is still,
"Better late than never?"

*******
"THINK about it."

Tuesday, August 29, 2017

Birthday Cake Bookmark- FREE Machine Embroidery PES File

           A Librarian friend of mine requested a couple of years ago some embroidered bookmarks that she could give to students on their birthday. 


Today I'm providing the 2 PES files to download.

One file is for one bookmark using the 5x4 frame
and the other is for 7 bookmarks made in the large frame which is about 11x8. 

For a quick review on how to make multiple bookmarks
please go to my previous post for the tutorial
Machine Embroidered Candy Cane Bookmark- Free PES file

Links for download
BdaycakeREADbookmark for 5x4 Frame Makes 1 bookmark

BdaycakeREADbookmark for 8x11 Frame Makes 7 bookmarks


Monday, August 28, 2017

Memory Mon 61~ 2017 Only 1 Purchase on 127 Yard Sale

The World's Longest Yard Sale of 2017
will go down as the memory of the longest yard sale and
ONLY 1 Purchase = 6$

Saturday, August 26, 2017

Quilt Shot Block ~ Quilts on the 127 Yard Sale


While not a quilt, I know we would have seen more had we stopped at different places.

Friday, August 25, 2017

Fun or Funny Fri Foto ~ Who Needs a Mug Organizer?

 Mug organizers are quick, easy and FUN to make.
 They don't take much fabric to make, especially when you use scraps.
 When I set out to make just one, 
I think of someone else that can use one
so I cut out another.


Before you know it,
I've spent a bunch of fun hours in the sewing room.

 Update:
Oh, I was reminded by the first comment that
you might like to have a pattern.
I designed this pattern after seeing Simplicity's pattern that used bias binding
which I despise using.

If you are interesting...take a click:

Mug Organizer


Thursday, August 24, 2017

Thoughtful Thinking Thursday #104 ~ Envelope the World

 Finally decided to just make a bunch of envelopes to fit the cards I make.
 Seems like I'm usually making a card at the last minute,
and the mailman is coming while I'm making the envelope!
I sent a get well card this week.
When was the last time you mailed a card in this world of social media.
*******
"THINK about it."

Wednesday, August 23, 2017

Wordless Wednesday #230 ~ Rainstorm Walker


 by Chris Jones
of
Harlan, KY
I love the texture the rain provided in these shots.
And, what about that color?
                    My friend Chris writes:
                           Rainstorm walker Wednesday on abandoned tracks along River Street in Harlan.
                           He seemed to not mind, but I suppose I could have tossed him an umbrella... 
                           Chris J. 
I really enjoy it when Chris shares his shots with me.

Tuesday, August 22, 2017

Sewing Patch Pockets-The Easy Flip Method

    Last Tuesday's Tutorial was the Draw Strap Backpack.  You can add pockets inside and outside as you like with the remaining bit of fabric or use scraps.
     Beginner's might need a tutorial for those pockets.  There is more than one way to apply patch pockets.  So here is the tutorial for what I call the "Flip Method Pocket."


******************
Tuesday Tutorial
******************
Decide the size pocket you need and cut the fabric double the length
so you can fold it at the top.
Remember to add extra on sides and bottom for seams.
Fold right sides together and pin corners.
Stitch from bottom up.
This trick helps make sure the corners match.
Flip over so the other side can be sewn from the bottom up.

 Turn right side out & press.

 Place pocket on desired location.

 Mark pocket 1/4 inch from bottom for stitching line.

 Flip the pocket upside down matching the lines drawn.
Pin and stitch along the line (across the raw edge.)

 Trim threads.

 Flip pocket back up and topstitch around edge.
Backstitch corners which will be pressure points.

 Trim threads on front and back.

That's it!


******************* 


 You'll find this post at several Linky Parties. Please check them out for some great ideas.


Thanks to 
GIMP for cropping & other digital effects
PicMonkey creating collages used on this page
 Photoscape for downsizing & watermarking photo

Monday, August 21, 2017

Memory Mon 60~ Rushing Mt. Rushmore

This time last year, Mr. G and I were getting ready to take my Bucket List trip.
Lots and lots of memories were made.

Would you believe, we never got to stop at Mt. Rushmore?
The traffic was so backed up.
I took drive by shots from the highway like crazy as we drove by.
From in between the trees I capture this shot.
We were satisfied and drove on instead of fighting the crowds.
Certainly was a special memory with a smile.

Sunday, August 20, 2017

Sun Best ~ Sunday Football: If it Takes Standing on Your Head

It's almost football season for NFL and NCAA.
Meanwhile high school is already at it.
Above is a shot my friend Chris Jones of Harlan, Ky shared with me.

He writes:
Harlan Independent quarterback Killian Ledford maneuvering about a Floyd Central defender who had been knocked onto his head during first-half play Friday.
I've got to wonder what #65 is doing?

Saturday, August 19, 2017

Quilt Shot Block #93~ No Tear Paper Piecing Woven Star


Woven Star

"Tear" is a homonym with at least 2 meanings that could be used correctly in the title of this post.
I don't cry and have no tears using this process.
While I really enjoy paper piecing and the perfection it provides,
ripping out the paper plays havoc with my arthritic fingers.
I despise taking out the paper in the paper piecing process.
 I found this video 3 or 4 years ago and was totally fascinated with Quilt N Bee's process.
First of all, since there is no stitching in the paper involved,
that step is basically skipped.  Such a time saver.
Also, paper is saved.  You can reused the pattern several times.

**************
I tried to do the process from memory.
Consequently, I've come up with a slightly different method than Quilt N Bee.
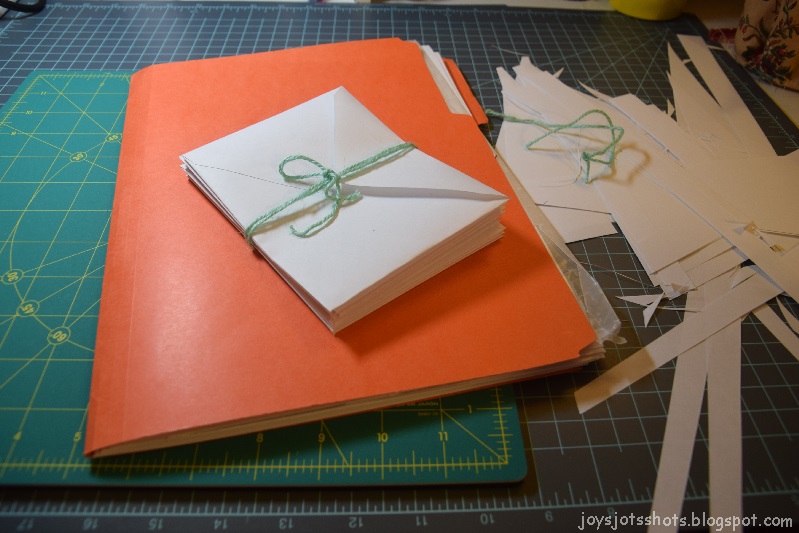
I downloaded their Woven Star pattern and printed 5 sheets of which I ended up using only 4.
You could just print 1 for a pattern to cut pieces ahead if you like to do that,
and only 1 more to make as many blocks as you can before it falls apart.

 After I printed the pattern, I chose the 7 fabrics I needed
laying them in the order I would use them from center out.
 Yellow was discarded and black will be used for the center.
 Patterns were trimmed leaving the outer quarter inch allowance.

My basic tools I used besides sewing machine and thread

Then to make this whole process super successful and easy was my
Joining or Edge foot, whichever you like to call it.

Two tools used for this process that aren't normally used in piecing a quilt
is the Add-a-Quarter Ruler.  Thank-you whoever thought of this idea!
The other is in your garbage; a straight piece of lightweight cardboard as in cereal box.
Here it's the piece of cardboard that came in a set of sheets serving as it's label.
It's cut to a size to be manageable leaving the straightedge uncut.
The lightweight cardboard is used to fold and crease the paper as straight as possible.
The straight edge is laid on the black lines and the paper is folded over the cardboard.
To start this process, each paper is folded on ALL the black lines.
Don't worry about folding over a previously folded line.

I did use my creaser (is that what you call them?) to create the folds on one sheet.

The completed block used 4 of these designs.
I experimented with the first, and when it was successful,
I then decided to do the remaining 3 in assembly line fashion.
Cut #1 using the section as a pattern being sure to add quarter inch seams all around.
Double pin so the piece won't shift.
*
For easy management, cut pieces of fabric 1¼ in wide or wider.
These coral pieces are measured long enough to provide sections #2 & #3.
 Fold paper so #2 section is facing you.
 Place fabric behind, right sides of fabrics together. (Right side of coral is facing you.)
Align the top edges and right edges of bother fabrics.
Above the piece is slightly flipped forward so you can see the backside.
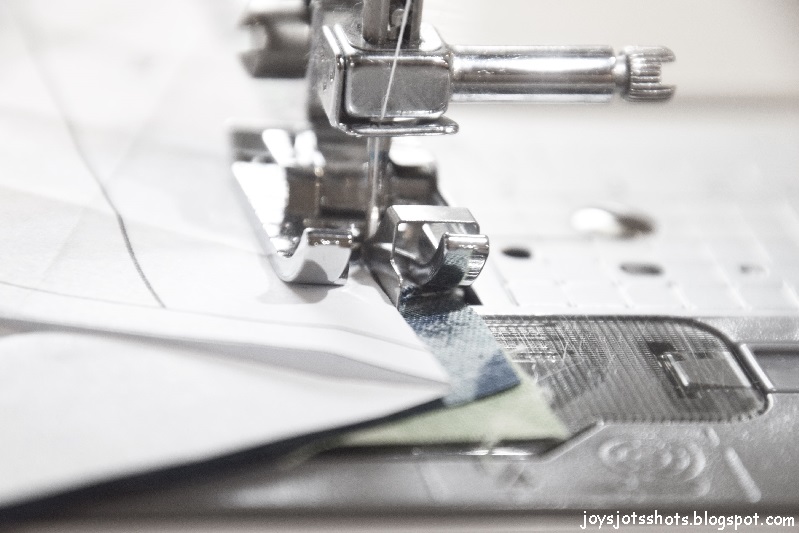
Using the edging foot,
move needle to right just behind the blade but where it will not stitch into the paper.
Stitching will be beside the fold of the paper.

Wherever your stitches land be consistent throughout block.


After EACH stitching, fold back and trim all around where possible as done usually when paper piecing.
For this pattern, the routine becomes the following if you matched at the * to start stitching:
1. Cut across long edge
2. Cut across angle.
 For the first time, you will use to cardboard to help fold.
Then use the Add-a-Quarter ruler to cut.

Trim on the angle.

Then fold back so #3 is facing you and repeat process until finished.
Small pins were used to hold the pieces in place as shown.
Be sure to push pins away from stitching line.


Meanwhile, the first one I made used very small dots of glue from a glue stick.
It torn the paper a bit and left residue on #1.

At this point, I go back and look at the Quilt N Bee video to see how they "stuck" the fabric to the paper.
The secret ingredient was freezer paper!
So I made one more block trying freezer paper.
However, I didn't stitch the paper or mark the end points.
Instead, I ironed my pattern sheet on the freezer paper,
folded the paper, and still ended up marking the sheet.


The first piece held ok, but by the time I got to the 4th piece,
I had to pin.  The wax paper didn't hold the pieces well enough for me.

In the end, I still had to use about 3 pins.
So use whatever works best for you.
********
All I know is, I have no tears when I don't have to tear off the paper.
It takes me less than a minute to take out 3 or 7 pins.

Otherwise for a detailed piece like this,
it would take my hands about 10 minutes per block to tear away all the paper completely.
With the 5 blocks I made that would be an extra 50 minutes!

I'd also need 4 more sheets of paper!

Guess which piece of paper was creased with the creaser?
***
Possible quilts

********************************
to check the layout of your block.

************************************

********************************