Mr. G and I are getting ready for our "Bucket List" trip. It seems I can never have enough small bags for a trip to help keep things sorted and organized. Mr. G likes buying things and stowing them away in a crevice in the car somewhere. Things get a bit scatter. I like keeping things together all in one bag. Even shoes.
Once upon a time, I had a small backpack made of a lightweight nylon. It folded up inside the front pocket for easy carrying. When I got to my destination, I pulled it out of the suitcase and filled it up with the small load I needed to carry on a walk.
I decided to make some "Bags in a Pocket" to stash in the suitcase to use later in the trip.
***************************************
*A Tutorial Tuesday*
**************************
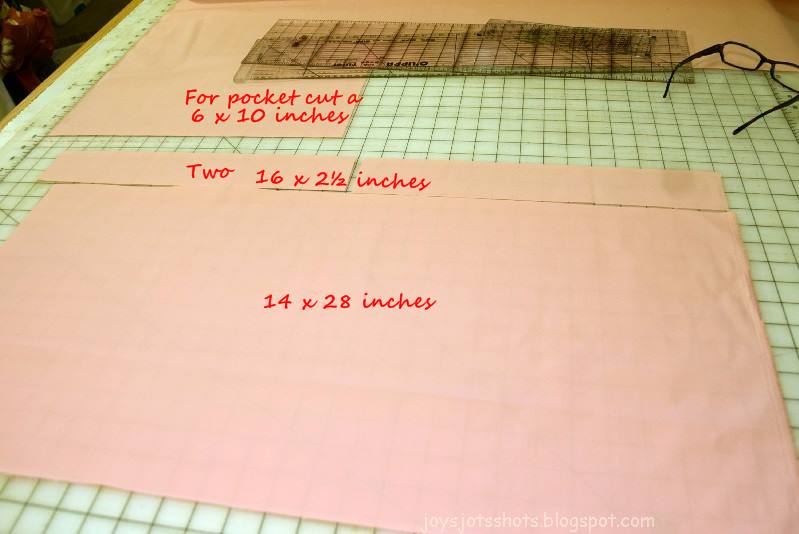
Cut size you desire for
bag, straps and pocket.
Notice the pocket is 6 inches wide which is
almost half the width of the bag.
Keep that ratio in mind if you decide on a different size bag.
Mark one end of the bag by ironing a crease down the middle, and
folding down the top 2 inches.
Next take the 6x10 inch pocket and fold hamburger style as we called it in elementary school verses the long way called "hot dog" style.
Iron a double fold hem of 1/8 inch each fold.
I like to use the Edge or Joining foot to help stitch close to the edge of the fold.
See the beautiful stitching along the edge.
Pin 5/8 inch below the top of the other side.
Right sides together.
On both sides start stitching at the top to make sure the measurement stays accurate.
Back stitch twice as this seam will take a lot of stress when putting the bag inside.
Fold the pocket in half and iron to make a crease down the center.
Turn the pocket OVER and UPSIDE Down and place edge along the crease that was ironed.
Also match the center creases.
Sew 1/8 inch from the edge.
Fold down leaving a fold above the top edge.
Press.
Unfold to see your crease line which is your stitching line.
Stitch across this line and fold back down.
Notice the stitching is invisible.
To stitch the bag section: Fold the bag piece "Hamburger" style with right sides together,
stitch the sides of the bag from top down.
To stitch hem around top: Fold and press a double seam of 1/2 inch each fold around the top.
Use edge foot to top stitch along the edge of the hem on the inside.
Turn right side out & see below for placing handles.
Next use your favorite method to make the handles.
One way I make them is with the strip folded in half with right sides together
stitch across one end and down the side.
I use a knitting needle to turn it inside out.
Cut off the end.
The seam is pressed to the center.
Pin the ends of one strap to just along the edges of the pocket.
Pin the ends of the other strap on the other side so handles are opposite of each other.
Mine came out to about 2¼ inch from the center of the bag to the center seam of the handle.
Machine baste each end of the handles to just below the top edge of the bag.
Turn up and do a cross stitch.
The X is made with one continuous row of stitching.
The top and bottom row of the X is stitched over twice
in doing this order of stitching as noted above.
This bag was made with the pocket on the outside.
You can make it on the inside by changing the direction of the hemming and handle placement.
********************************************
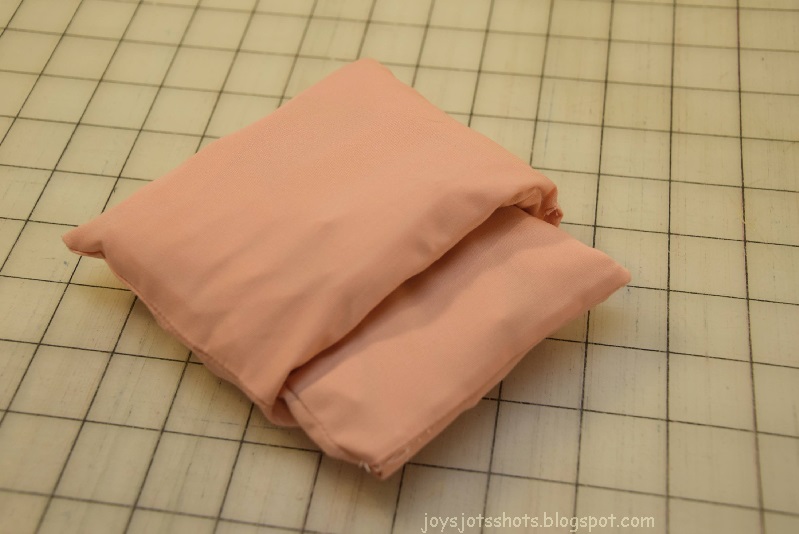
How to Fold the Bag into the Pocket
The pocket must be on the outside.
If you made the pocket to be on the inside, you will need to turn it inside out to fold into the pocket.
On the left is another bag already folded into it's pocket.
Turn the bag over with the pocket on the other side from you.
Fold bag along the edge of the pocket.
Then fold the bag up using the pocket length as a guide for amount to fold up.
Handles go in the pocket first.
Stuff the bag in the pocket and flatten out.
I still had room to put one inside the other pocket, sort of.
********************************
********************************
Thanks to the FREE programs:
possibly used for this post
PicMonkey creating the icon used on this page