

Here is the simple way to hand stitch hexies like our grandmothers used to do. Not the EPP way. No need to cut papers, use glues or take the time to remove papers. The stitching in this tutorial is for right hand stitching which works right to left. I imagine left hand work will be left to right?

a template,
fabric scraps,
a pencil (I use a heat sensitive fine tip marker),
very sharp scissors,
finger cushion that holds only
ONE pin
ONE needle,
thread
small scissors (these fold) to cut thread if you don't want to use your scissors.
As you can see my thread spool and scissors are attached to my thumb cushion because everything kept falling on the floor while I was stitching.


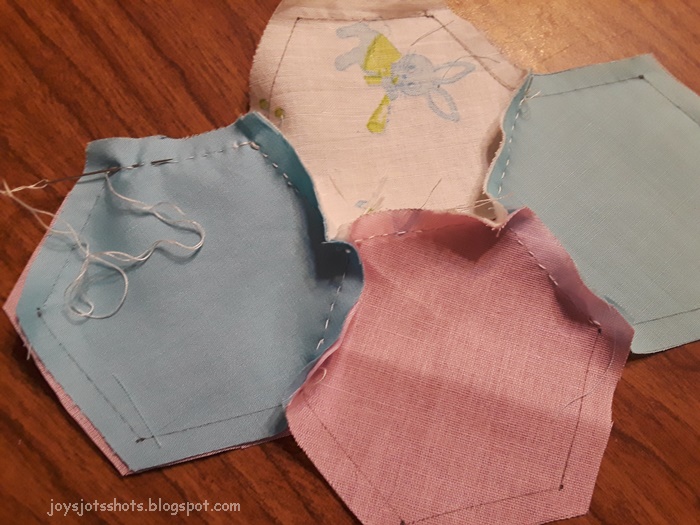
For a Grandmother's Flower Garden Flower you'll need a center and 6 "petals."
The Flower Garden pattern actually surrounds each flower with with white hexies, I believe.

The secret to perfect corners is matching the corner dots as perfectly as possible.
Our Grandmother's didn't have the luxury of the point holes on their templates.


Insert pin and needle perpendicular to fabric in order to match dots.


Begin with a knotted single thread, then back stitch 3 times.
Once you've had to take out one of these seams,
you'll understand how secure this method works.

Remove pin, and bring needle out through dot.


As with beginning of stitching line, end with 3 back stitches.
Do NOT cut thread if you can go on and stitch another seam.

With thread still attached, open the pieces.

So that I can keep stitching right to left,
I've turned over the work, and
pinned the outer point.


Check back side to make sure you're on target.

Match the inner points with the needle.
Triple back stitch and proceed stitching the seam.

For seams that combine 2 petals, 3 back stitches are used at the end of the seam,
then before cutting make about 3 stitches going back,
or I sometimes use the embroidery Outline stitch.
Then cut thread because you can't go on to another seam at this point.

Open.

Pin the 3rd piece to center as shown,
and folding over the other piece in half.

Begin and end stitching line with 3 back stitches.
Do NOT cut thread because you are able to stitch on another "petal."
Repeat the process until you get to last "petal" and cut thread.
TIP------DO NOT bring the needle OVER a seam,
but always go through the seam on the dot when need.


For right hand work, place the last "petal" on the right.
Pin inside corner and start stitching with knotted single thread
from outside right. Remember back stitch 3 times.

Pull piece around to match center edge.

Again, beginning and end with 3 back stitches.
All this back stitching will truly hold the seams together.
Do NOT cut thread.
Once more move the pink piece on around to line up with the blue
for the last seam.
Pin match the outer point,
beginning with the triple back stitch,
and end with the triple back stitch.

Because points were matched,
the corners should come out perfect.
A tip by a hand sewer:
Thread several needles before you start.
Then you don't have to pause to thread a needle.
Also, thread the needles when daylight is good.
Sometimes it's harder to thread needles by night light.
Linking this post to:


