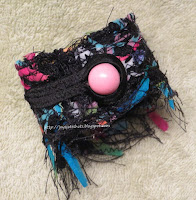
This bracelet idea came from a "Sewing with Nancy" program.
As with lesson 1, this lesson also is 1 hour long which provides for immediate success, and something to take home as a result of the session.
~~ Sewing Lesson 2 ~~
For this project you will need water soluble stabilizer about 4 inches wide.
Go into your waste basket, yes you read that right, and get snippets of fabric.
Spread around on the stabilizer.
You can also use threads & yarns.
I was hoping this encouraged creativity.
Notice all white space was covered, but about half inch was not covered on all edges.
Fold in half and pin. Yes, pinning practice for the Beginner.
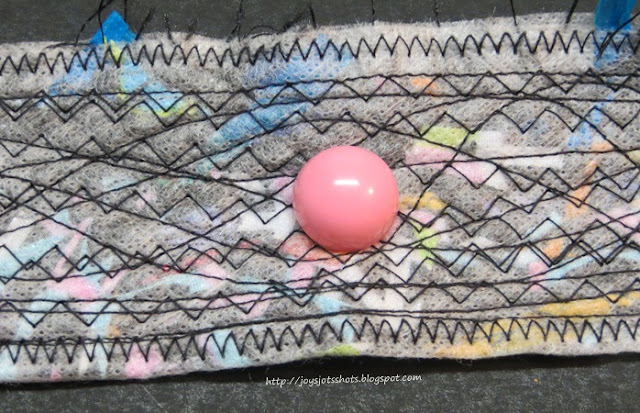
Then randomly sew with a straight stitch and later switch to a zig-zag stitch.
Get some practice done on pivoting and sewing curves.
Stitch over as much area as possible.
Keep in mind that all fabrics and threads need to be attached to each other by a stitch.
The white area will be gone later.
Stitch a pony tail holder to one end.
Wrap around wrist and decide where to place a shank button.
We used a shank button, because we didn't want to have a lesson about sewing on buttons today.
Instead, we used a safety pin to attach the button.
The safety pin also allows for adjustment in size later if need.
Now comes the fun part.
Soak the bracelet in warm water to get rid of the stabilizer.
When all the stabilizer has disappeared, roll in a thick towel to soak up water.
Use a blow dryer to finish drying so your Beginner can wear the bracelet home.
Sharing at several Linky Parties.
Thanks to the FREE programs:
possibly used for this post
GIMP for cropping & other digital effects
Photoscape for downsizing & watermarking photo
PicMonkey creating collages used on this page


That's really cute, I should have my 11 year old give this ago
ReplyDeleteWhat a fabulous idea, Joy. I would never have thought of using stabiliser like this. This would be a great way to make a hair band, too. Hope you don't mind, but I'm pinning this...
ReplyDeleteThis is awesome! I am so proud to know you. How sweet to teach this young student how to sew, not only that, but you are making it so much fun too! I really do admire you, sounds like the teaching "gene" doesn't retire, how fortunate for your student too! ~Diane
ReplyDeleteThank ALL of your for your precious comments.
ReplyDeleteSaved this page in order to have some sewing ideas when my granddaughter arrives.
ReplyDeleteBlessings,
Janis Www.janiscox.com Found you at Thursday Favorite things
This is a great tutorial for beginners! Thanks for coming and linking up with me today at Fidlin' Fridays!
ReplyDeleteHow funky, I don't think we get this stabilizer here!
ReplyDeleteVery cool outcome!
Thanks so much for linking up on Tutorial Thursdays Linky Party, I look forward to seeing what you share with us this week.
x
Natalie
Marigolds' Loft
you rock, nuff said
ReplyDelete