

******************
Tuesday Tutorial
******************


For some reason, I started by making bookmarks first?
I used a free jpg picture of traditional gift tags that I pull up in the
free program PhotoScape and typed in titles
I thought might be bookmarked in this memory book.

The papers were coffee dyed, then pasted to the printed side of
cardboard boxes.
The back side is blank providing room to write notes.

I tried a very thin layer white liquid glue,
but later found out the glue stick worked faster and
didn't wrinkle paper more.
Besides I would be stitching around all edges to keep the paper adhered to the cardboard.

A hole puncher was used

Each card was machine stitched around the edge.
A 3.0 length stitch was used.
I opted to use off white thread rather than the black that I saw many use on You Tube videos.
With the change in texture the coffee created and the stitches,
the paper turned out to have a more fabric look, almost suede like.

Strips of scrap fabric were looped through the hole.
In this picture the cards appear to have a metal hole cover,
but just a simple hole punch was used.

Last year's insurance update booklet was made from recycled paper that had that vintage brown look to it.
Knowing as a teacher this was also the direction my grand daughter was headed,
I decided to use some of the pages to make pockets.
First, I did the old "fold the corner to make a square" routine
and used a ruler to tear off the end of the sheet.
This is definitely a real "old school" technique.
How many of you did that in school?

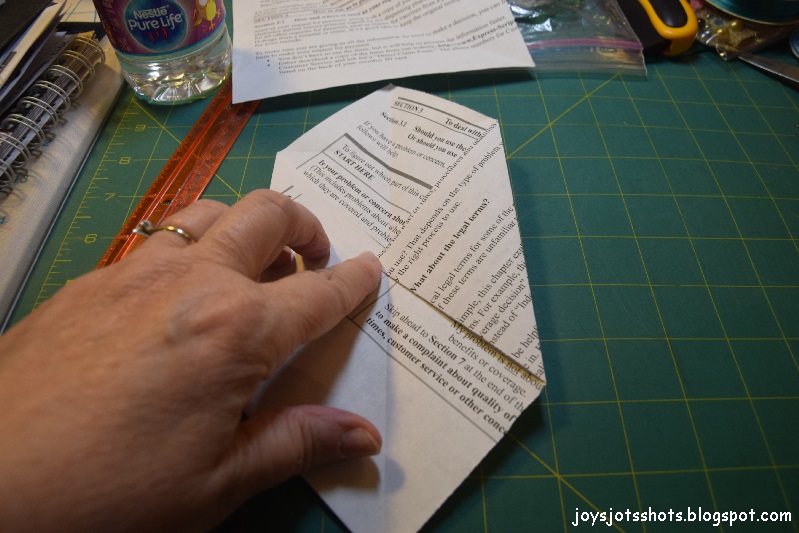
All 4 corners were folded to the center.

A simple piece of fabric was sewn for a flap with raw edges exposed.

A line of stitching was run around the other 3 edges to keep the envelope from unfolding completely.
Notes, and pictures can be placed inside.
 I looked for junk mail that had the same thickness as cardstock.
This bundle of cards came in the mail together and were blank on the back side.
 They were cut in half & fabric stitched on the printed side.
 Plenty of room for writing notes on the back.
 A piece of red ribbon was stitched on &
placed in a corner pocket made from the insurance booklet paper.
Using my quilting praire point skills,
the pocket is made so the folded edge is at the opening.
The corner edges of the pocket were zig zagged.
I know some junk jounalers would have
rubbed the edges of some of these pages with a stamp pad coloring to
make them look older. I left as is.
Next week, a flip through the journal will start.

This bundle of cards came in the mail together and were blank on the back side.


placed in a corner pocket made from the insurance booklet paper.
Using my quilting praire point skills,
the pocket is made so the folded edge is at the opening.
The corner edges of the pocket were zig zagged.
I know some junk jounalers would have
rubbed the edges of some of these pages with a stamp pad coloring to
make them look older. I left as is.
Next week, a flip through the journal will start.
******************
Related Posts:
Related Posts:
Junk Journal ~ Making the Fabric Cover
Junk Journaling ~ The Innards~ A Flip Through Signature 1
Junk Journaling ~ The Innards~ A Flip Through Signature 2
Junk Journaling ~ The Innards~ A Flip Through Signature 2, Part 2
******************************************
You'll find this post at several Linky Parties.
Please check them out for some great ideas.
Thanks to
FREE Photoscape for downsizing, photo enhancements & watermarking photo
Open Office for the FREE word processor
Wow -- what an interesting post. I would never have thought of dying paper like that. I love that you use "found" cardboard in making your art.
ReplyDeleteOh, my goodness! I love those tags and envelopes, especially the coffee stain and stitching along the edges. How very clever! I'd like to feature this post at Tuesdays with a Twist. -Marci @ Stone Cottage Adventures
ReplyDeleteThank you very much. I'm honored to have this post featured.
Delete