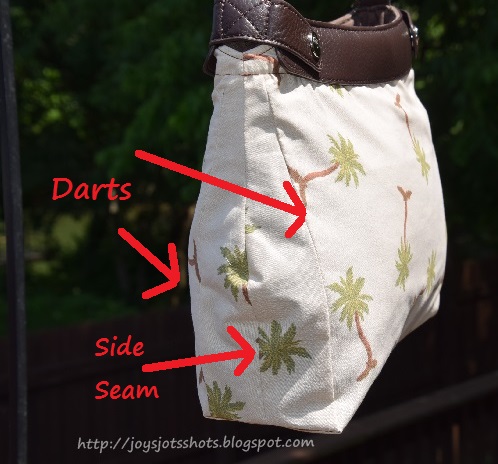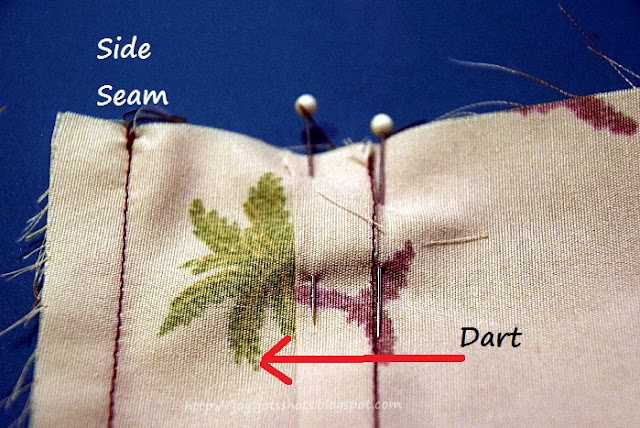
This is a closer view of the dart construction for the free Large Purse Skirt pattern. The darts make this purse cover a bit easier to make rather than stitching in the extra pattern piece for the ends and bottom as seen on the original skirts.
*********************************
First, make sure you have marked the dart beginning point noted on the pattern. Please don't let the curve stitching on the left throw you off. After this cover was made, it was decided it's best to sew darts before adding the top facings and finishing the ends.Next, mark the darts by folding the darts matching the clipped marks at the bottom of the bag as noted on the pattern. The fold should meet at the point marked in shot above.
Then draw a line from the point to the clipped marks.
When making clothing, dart sewing usually starts at the wider point. In this case, I started from the point leaving long end threads.
I didn't back stitch when I started at the point, but rather tied off the long ends. I tie twice, then switch hands on threads and tie one more time. (Like I do when I'm tying quilts.) Then trim threads
Next, press darts toward side seams.
Stitch both side seams.
THEN match the seams of the darts very carefully.
Matching the dart seams is very crucial to the completed look of your purse cover.
I placed a pin at the seams, and one pin to hold both darts in the correct direction to help stabilize the seam. Then, stitch across the bottom.
Trim corners.
Then you are ready to create the boxed corners.
Closer look at Boxed Corner Tutorial Back to Large Purse Skirt Tutorial & Free Pattern
Original Purse Skirt Tutorial & Free Pattern
Original Purse Skirt Tutorial & Free Pattern
**********************************
Sharing at several Linky Parties.
Thanks to the FREE programs:
possibly used for this post
GIMP for cropping & other digital effects
Photoscape for downsizing & watermarking photo
PicMonkey creating collages used on this page


Great tut!
ReplyDelete