The farm guys in the family have traveled twice in the past year to sell cattle. So for Christmas I made a drawstring bag to hold their gift and also thought might be suitable for a cowboy hat wearing guy to stash away in his clothes bag. I don't think they carry rolling suitcases?
The thing that takes me time in making draw string bags, is threading the string through the casing. I require 2 strings so it can be pulled from each side. That means double threading. I've decided this type of casing works easiest.
*****************
Tuesday Tutorial
******************
Please do not get hung up on measurements.
My green pieces were already cut when I got them in a scrap bag.
You use the size you need to hold your gift.
These 2 green pieces are 12½ inch square.
These pieces are laying on a 1 inch grid.
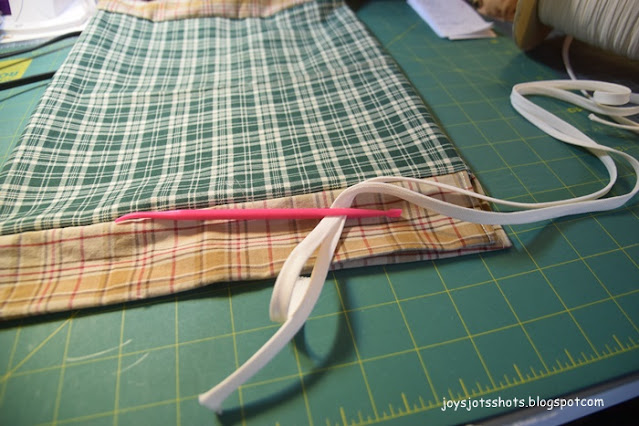
The brown pieces to be the channel to hold the string,
is cut 1 inch shorter
than the width of the main piece.
This brown piece is 11½ x 4½ inches.
Then fold the pieces in half lengthwise "hotdog style" to meet raw edges.
Stitch to green pieces as shown.
A serger was used here for a clean finish.

Notice the ends of the brown piece is short on sides
by a seam
so you have room to stitch seams
without catching the string channel in the seam.
so I added pieces to the bottom.
You do what you need to fit your item.
use your favorite seam finishing method.
A serger was used here.
You can use the French Seam if you have enough seam allowance.
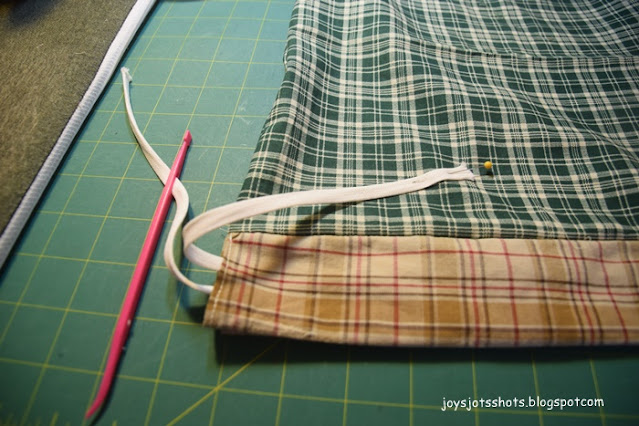
Cut or make your string to go about 2 inches beyond each side.
that could hold 2 strings at once.
Slide both strings through one side at one time.
and take the other through the other side.
then slide the other through the other side and tie.
Done.
I added a key chain trinket that came in this box,
because they are all deer hunters.
The red ribbon is attached to the gift tags I made.
Hope this tutorial was easy enough to follow
to make any size bag
with the size of fabric pieces you have.
Consider piecing together fabrics to make a patchwork bag.


I am currently sitting on the computer waiting for some Tylenol to kick in for my hands after struggling with putting elastic and cording into PJ pants for #1 son. Talk about a pain (literally) despite having basted all the seam allowances down. Glad I don't have to make too many things with that sort of problem. Like your bag idea - definitely good for the guys.
ReplyDelete