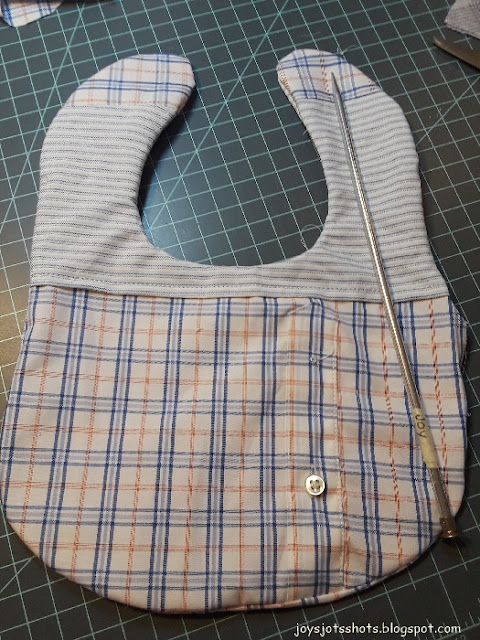
Back on a recent Fun Friday, I mentioned spending a few quick hours using my quilting scraps or scraps given to me to make baby bibs. After making several, and continuing to refine my techniques, here is my method to date.
******************
Tuesday Tutorial
******************
First, cut out a muslin or simple fabric of the pattern.
There are many free patterns available online.
Check my links and thank-yous below.
You'll see others later that use pieces of various sizes
randomly put together.
like I started to do.
This cutout will be used to pattern the layout for other bibs.
The cutout is only to be used AS A GUIDE.
I find the cloth pattern is easier to handle,
rather than paper.
Lay these 2 pieces right sides together,
pinning the cutout over them.
NOT ON the cotton cutout.
Decide where to not stitch to leave an
opening to turn inside out.
The opening should be on a rather
straight edge.
Due to where seams of scraps land,
this could be a different place on each bib.
Mine are usually on the side,
Set stitch length to 1.8
Stitch a 1/4 inch seam all around (except opening)
then
Trim seam to 1/8 inch width
EXCEPT
for opening which stays at 1/4 inch
to turn inside out.
Because the stitch length is 1.8,
its a very strong seam.
Then top stitching as close to edge as possible
makes it even stronger.
Top stitching along the edge
also will be sure to close the
opening that is still a 1/4 inch seam.
I don't have an edge stitching foot which is my fav
for going along the edge of fabric
or what Janome calls a "Stitch in the Ditch" foot yet.
It's on back order.
How is it that a machine made for quilting,
didn't come with this foot,
but I had to buy separate?
Instead the narrow hem foot came with it. For quilting? Why?
However, I do find this narrow foot easy to maneuver
close to the edge for top stitching.
It depends on where scrappy seams show up,
The look of the bib,
and what matches.
It's fun to leave details of a man's shirt on the bib.
This bib was made for a baby
from his Grandfather's shirt.
Have fun using your scraps.
*********
Many thanks to the following for the free patterns:
Chickpeas Studio @ https://chickpeastudio.typepad.com/chickpea_sewing_studio/2008/01/chickpea-infant.html
Made Every Day @ https://www.madeeveryday.com/babies-polka-dots-a-free-pattern/
Made Every Day @ https://www.madeeveryday.com/babies-polka-dots-a-free-pattern/
Sharing this post @
Stone Cottage Adventures: Tues with a Twist.... Check out all the ideas on this linky
Small Quilts and Doll Quilts: Great quilt ideas shared here.
Love Laugh Quilt: Lots of quilts shared here. She also does a You Tube nearly every week.
Create with Joy: This linky includes a variety of crafts, recipes and thoughts for the day.
Sum of Their Stories: Usually a very large Linky so LOTS of ideas Quilting is More Fun than Housework: A linky that's ALL scrap projects!
Melba Loves Scraps : Also, a linky about scraps
Southern Sunflowers: OH MY....Such a variety of Recipes and things to do on this linky


Thanks for the tutorial. Bibs are a great use of scraps, and a quick project. Blessings! Thanks for linking to Sew & Tell. <3
ReplyDeleteVery nice bibs. Great idea to use scraps too. You make it look so easy to make.
ReplyDeleteI've never seen quilted bibs but they are adorable! pinned
ReplyDeleteNice tutorial Joy! I smiled when I saw the button you left on the shirt scrap. This is a good project to use up our scraps. Thanks for joining in with the Design Wall Mondays Linky Party. Hugs, Judy
ReplyDeleteBibs are always handy for wee ones. Thank you for the great tutorial!
ReplyDeleteWhat a great way to use Grandpa's shirts! Great tutorial! xx
ReplyDelete