

For 6 weeks in this past September and October,
I taught a "Quilts during the Civil War Era" unit
@
The Christian Academy of the Bluegrass
in
Georgetown, Ky.
I created a unit that included some studies of
the Underground Railroad and the Civil War
which is a major part of Kentucky History.
Of course math skills were taught and used in this unit as well.
This quilt was made up mostly of the common beginner's block
the Nine Patch
and a few made a Shoo Fly.

We were able to borrow enough machines for each of the 10 students.

Each student cut out the block pieces the old fashion way like they did
during the Civil War era, using a paper or cardboard template.
It's not easy to be accurate if you've ever tried it.

When I was the age of this group,
it was before the rotary cutter day and I had to cut my pieces with a template.
Yuk.

Students designed about 24 basic 9 patch blocks.
They were displayed for sharing ideas.


More designing.

Ironing blocks which included some finger pressing first.

Each student was to make 2 blocks.
For the second block I cut several squares
to speed up the process and
hopefully to squish the discouragement from
using a template.
The few students that made a Shoo Fly were shown the easy way to
make 2 half square triangles at a time with larger squares.
One student actually did some paper piecing.

Tape was used to help stitch the 1/4 inch seam.


Because of time constriction, I took home all the blocks
stitched student names on each block,
and put the blocks together.
I added a border around the quilt.

It was decided a binding wouldn't be used,
because that would take more time,
but rather what I call the "Eleanor Burns Method"
of sewing the top and backing face to face and turning inside out (birthing the quilt.)


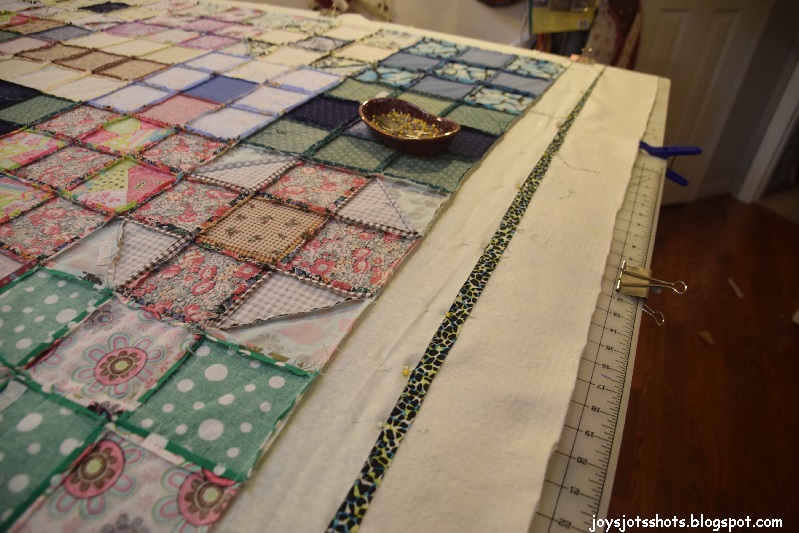
You can see the border added here.
You can see here when I expand my table to work with the quilt,
the edge is a bit flimsy but still holds the quilt.


An opening has to be left to turn the quilt inside out,
so double pins always flag where to stop and start sewing.
This is where straight edge, squared corners are paid attention noticed.

After stitching all layers together around the edge, before turning inside out.
After the quilt was turned inside out,
I did hand stitch the opening together for a neater and tighter closing,
then it was topped stitched all around the edge so the seam wouldn't have added stress
and to hold the layers in place, somewhat.

Then it was taken back to class where I showed them how to tie a quilt,
which I suspected a lot of quilts in the Civil War Era were quilted.

It's not easy to go through all layers with yarn,
but it was done.

One person stitches the yarn in fist space apart.
The yarn is cut half way between stitches then tied.
We tie twice, then switch hands and tie once more.
Cut ends to about 1/2 inch.


We got it tied in about 2 1/2 hours which was their class time, study hall and part of recess.
Yes you do notice a tag.


We plan to auction the quilt later in the school year.
The "Quilts of Civil War Era" has been published.
More next Tuesday.
The kids (and you!) should be very proud of this! Who knows, perhaps you've instilled a love of quilting in them and they will go on to quilt the rest of their lives.
ReplyDelete