

This is a series of the process of making a
quilt from 7 men shirts.
An idea from "The Thrifty Quilter" blog that has been deleted from the internet.
This post shows how the pieces of shirts are cut efficiently to provide
the pieces for the quilt top.

After pieces have been rolled up,
be sure to press and if you like,
starch the pieces.
Yes, I pressed my pieces even though they don't look it.
First the light shirts are cut apart.
Use the SLEEVES AND FRONTS.

Take BOTH SLEEVES ,
cut FOUR 6½ in squares.
**
I cut across 6½ inches apart
being careful to measure first (twice) to make sure
I can get 2 blocks out of a strip.
Then cut the strips into 6½ blocks.

cut FOUR 6½ inch squares
and the rest in 2½ inch strips with ends squared.
MY shirts were about medium size.
From larger shirts you should be able to get 4 squares,
and maybe more than one 2½ inch strips.

into 2½ inch strips.
Square off ends
where strip is no longer 2½ inches wide.

For easier rotary/ruler cutting,
fold shirt carefully and place fold
on line.
Because I couldn't get the fourth block
from the other shirt front,
I cut one block from this shirt front
which is the reason for seeing the 6½ inch wide strip first.
After the square was cut off the end of this wide strip (not shown),
the rest was cut in strips.
Repeat cutting blocks and strips with other light shirt.
Each shirt should provide TWELVE 6½ squares.
Set aside rest of light pieces including the backs.
Next take the DARK SHIRT FRONTS AND YOKES
and make as many 2½ inch strips as possible.

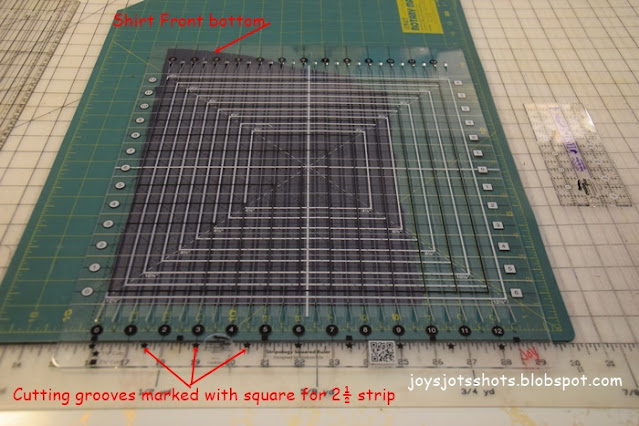
I LOVE this ruler for cutting strips.
I should have folded this shirt front to fit inside the
cutting area of the ruler.
The shirt tail is at the top of the picture so I could align
the straight front of the shirt.

After you've cut up the light fronts and sleeves,
and the dark fronts and yokes
this is what you have.
You are now ready to start piecing the main part of the quilt top.
That will be Part 3 next Saturday.
enJOY!

Great tutorial Joy! As I think I said before, I wish I still had my Dad's well-loved plaid shirts.
ReplyDelete