
 For Christmas gifts I made some Basketball yard banners for 3 of my BIG University of Kentucky basketball fans. Here's how I did it.
***************************************
*A Tutorial Tuesday*
************************


Used my Mother & Dad's old yard flag to help provide the measurements.

You can use many free clip arts websites to download a basketball.
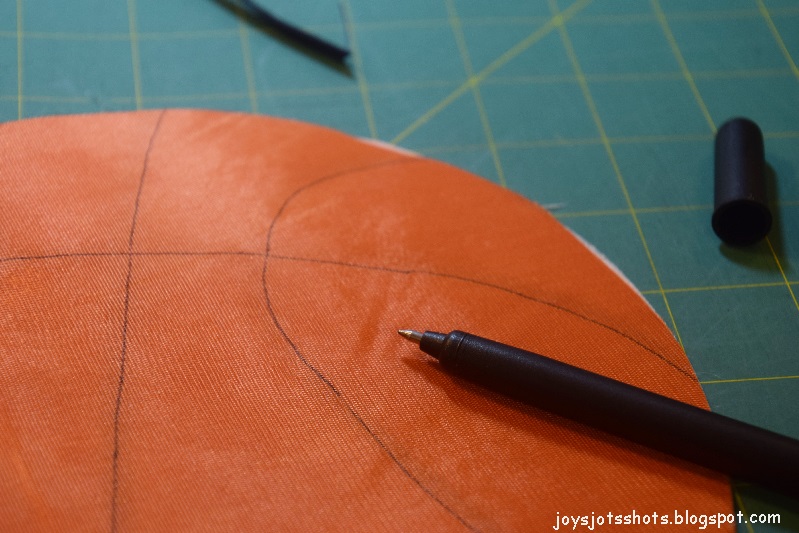
I sized mine to 236 x 236.
No need to print in color because you only need the black lines.

After I had made the first flag, I made 2 more at the same time.
Here are 4 layers of the copper fabric and iron on interfacing.
I used my rotating cutting mat to cut the basketball pattern.


Ironed on interfacing and trimmed a bit more.


Old stash.

Used a 4.0 stitch length with a width to be inside the bias tape edges.


The reason I cut 4 basketballs for 2 flags?
To add another layer so the background fabric would not show through.


Used orange thread.


I used "Varsity Regular" font size 400.
Both letters printed on one page.
You can download and install this font from free font websites.

Again, because I was making 2 flags,
2 layers of each fabric (from scraps)
were cut close to size so it would be easier to cut out the letters.
In this case I ironed on the interfacing to these fabrics before I cut the letters.


Some time was taken to decide on layout of letters,
and especially how much layover to allow.
(Reminds me of the days when I put up bulletin boards in the classroom.)


To make the casing at the top for the flag holder,
I measured as shown & snipped.
Flag was unfolded and edge between snips was double folded and topped stitched.(wished I'd shot this)


Folded flag so right sides met.
I trimmed because the bottoms didn't meet just right
after the applique was done.
As the graphic before this one stated,
each side was began with a zig zag stitch at zero length and repeated about 4 times for reinforcement
before proceeding with a regular stitch.
Opening left at bottom for turning inside out.
If you have light weight fabric, you might be able to turn through one of the casing openings at the top?

Turned right side out and pressed.
To finish making flag pole casing,
to top edge was folded down and pressed to make a crease to create a stitch guideline to follow.
Thread was used to match the front of the flag.

A yard flag pole was given with each flag.
********************************
Sharing at several Linky Parties.
********************************
Thanks to the FREE programs:
possibly used for this post
Photoscape for downsizing & watermarking photo
PicMonkey creating the icon used on this page
A lot of work went into this but it looks fantastic!
ReplyDeleteSuch a lovely detailed tutorial, thank you. your flag looks lovely and I love the fact that both sides look good.
ReplyDelete