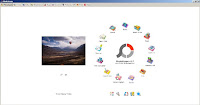
PhotoScape is a free software that I have used for years. I started using it to watermark my photos & to resize them because blogger had limits on size of pictures when they used Picasa. If the size was under 800 the picture did not count toward free storage.
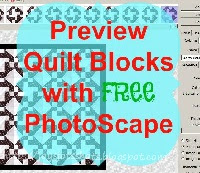
Recently I posted a Quilt Shot Block entitled Praire Queen. I had wished for a free software that would let me view the block in a quilt top view so I could see the sub-designs the block might create. So I started poking around in Photoscape and found out it's really easy. Here's how.
**************************

Using PhotoScape to Test a Quilt Block Design
You can download Photoscape for free @ http://www.photoscape.org/ps/main/download.php1. Take a square shot picture of your sewn block & transfer the picture to your computer.
2. Open PhotoScape & open Editor
Note: The UNDO button in the bottom right corner can be very helpful.......
Note: You might want to use 'save as' and name the block according to the size you created.
7. Now you are ready to combine the block to see what it would look like in a quilt. Go to the top of the screen and choose COMBINE.
9. At this point use the keyboard shortcut to copy, CTRL+C (hold control key and hit the C key) which will copy the single block. This will be faster than dragging more blocks.
10. Choose CHECKER, the NUMBER OF COLUMNS, SMALL SIZE you want to see in your virtual quilt top. Use the buttons in the right column.
11. Now that you have copied the single block by using the keyboard shortcut CTRL+C (hold control key and hit the C key), you can paste the quilt block quickly with the keyboard shortcut CTRL+V. If that doesn't work, just continue to drag the block repeatedly. You should see the "quilt top" appearing.
Note: You may need to use the zoom button, or go back and resize your picture.
12. IF you want to see what the blocks would look like with binding, use the OUTER MARGIN tool & MARGIN COLOR on the right.
Looks like a real quilt!!!!
Amazing?
A tip: If you find you need to delete some of the blocks you added, say you want to see a smaller top,
you can delete some of the blocks in the bar at the top with a keyboard shortcut as well. Just click on the any block, hold the shift key, and click on the anothr block. This will highlight all in between the first and last block that you clicked on, then choose delete on your keyboard.
Hit delete on the keyboard and bam, they are gone.
Hope you find PhotoScape useful in planning your next quilt!
Meanwhile, I think I'll go see if I can change colors of this block & see how that would look.
I could combine it with another block? Please let me know what you discover.
Note: You might want to read the comments to this post to see if anyone has added other tips & ideas.
Note: You might want to read the comments to this post to see if anyone has added other tips & ideas.
Thanks to Chicken Chick for faithfully hosting a Blog Hop every week. It's been 2 or more years now?
*********************
Thanks to the FREE program
*********************
Thanks to the FREE program
Photoscape for downsizing & watermarking photo & other alterations to pictures.
Yep, I used Photoscape to help make this tutorial.
I also used my Printscreen button and good ole fashion Paint to make the screen shots.


Absolutely brilliant idea! I use Photoshop etc all the time do to things like this, It's perfect for quilts and you made it easy to do. Thanks for contributing it to SHARE IT 28 linky party at FineCraftGuild.com. Love it, and will Pin it later today! Hope to seeing you again Saturday at the next party! ~ Rose
ReplyDeleteI can do something similar with Picasa but it looks like I could do lots more with PhotoScape. Thank so much for the tutorial!
ReplyDeleteThis is absolutely wonderful. I didn't know you could do that. Thanks so much. Linda @Crafts a la mode Pinned.
ReplyDeleteWhat a great way to see the many different versions that can be sewn with one block, Joy. Thanks for the tutorial.
ReplyDeleteI just found your site from "Threading My Way". I was wondering if you could make a follow by email option.
ReplyDelete