************************************
Back in the late 70s and 80s, I guess you can say I hoarded things like thread because it was so cheap. Some would say that would be a waste of money because thread can deteriorate. I can't tell this polyester thread is any less stronger than the thread I would today have to pay more for than the cost of 7 of these spools back in the 70s. I call it an investment as I'm having a great time using up my stash in my retirement now.
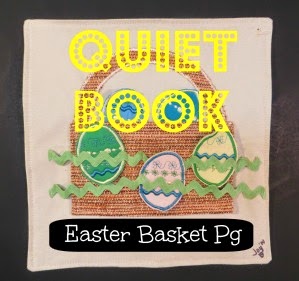
If you like creating, then you'll enJOY making the eggs for the basket.
The first eggs I made for the first child, I didn't add the numbers. From now on, no matter the age, I think I will add the numbers, because one day they will be learning about numbers. If your machine doesn't stitch numbers, then use a permanent marker.
This is also another time you get to use your threads like a kid with a box of crayons.
I stitched as many eggs as possible with the one loaded color.
All eggs were decoratively stitched, then cut out and satin stitched around the edge. I could have made an embroidery file to do all this, but this left the creativity more to me and the fabrics I have on hand.
On a 12 x 12 cloth page, as explained on the Rabbit Finger Puppet page, I first cut out the handle pattern on freezer paper. Ironing the wax paper pattern, wax side on fabric, attaches the pattern to the fabric and makes it much easier to cut out than using pins. (sorry no pics). After you've appliqued the handle to the page, then add the basket bottom.
The basket bottom is stitched like the pocket for theRabbit Finger Puppet page
The Rick Rack was tacked leaving spaces for eggs to fit.
**********************************
Sharing at several Linky Parties.
Thanks to the FREE programs:
possibly used for this post
GIMP for cropping & other digital effects
Photoscape for downsizing & watermarking photo
PicMonkey creating collages used on this page


What a sweet basket Joy so clever how you made it too. Don't feel bad we all hoard these crafty things when they are on sale! Sooner or later we will use them and save a ton when we do! ~Diane
ReplyDeleteI think it's great that you've kept the sewing notions, Joy. The eggs look fabulous decorated with embroidery.
ReplyDeleteOh how cute! thanks for posting!...Christine
ReplyDeleteWhat a fun project and can you believe the price on the rickrack!! I have older thread that seems strong too and I use it. Thanks for sharing.
ReplyDeleteFreemotion by the River Linky Party Tuesday
Great Easter basket!!!So good tutorial too!
ReplyDeleteCongrats