Thursday, December 26, 2013

Blue Jean Christmas~ What is It?

   Featured @
   I created some up-cycled gifts for Mr. G from 1 pair of blue jeans. This gift was something he needed, but I mostly made it just to have a good time watching him guess what it was supposed to be. 
    None of my Face Book friends/family have guessed.  I did find this idea on Pinterest.
    What is your guess?


It was made from 1 pant leg and 2 back pockets.
The leg was cut apart at the seams,
 then sewn end to end to make 1 long strip.
Do you know what it is?
 Now do you know what it is?
Hopefully he'll put his remote and glasses in the pockets 
so he won't have to spend so much time looking for them?
The other part of the leg with the hole in the knee is used to go under the cushion 
so the pockets won't slip off the arm of his couch.
With the other pant leg, I made a couple of quick pot holders. 
Something a bachelor chef  always needs.
I also made a cloth bowl to set on his end table to collect stuff. 
We all have stuff on our end tables don't we?
I did give him a brand new pair of jeans.
So it turned out to be a Blue Jean Christmas for Mr. G.

************************************
Sharing at several Linky Parties.i.e Home Stories A to Z
Thanks to the FREE programs:
possibly used for this post
GIMP for cropping & other digital effects
 Photoscape for downsizing & watermarking photo
PicMonkey creating collages used on this page

Thursday, December 19, 2013

Collection of Homemade Stockings


Hoping the collection of stockings I've made this season might inspire you.

You can find a pattern on my, 
 "Making Christmas Stockings - Free Pattern & Tutorial" post.


****************

 Then added one for a little girl to that first collection.


 Just realized the one above and below for the same family, were made in opposite directions.  oops.
These designs were special requests.
(yes, you've seen these in tutorials on previous posts.)
  
       These aren't finished as they were started by the person that brought them to me for embroidering. All she needs to do is stitch around the edge.  I like her idea of quilting the fabric, making the top extra tall to fold down. She will have to use a french seam so when the top is folded down, a raw seam won't be seen.
       Gold metallic thread was used for embroidering which does like to break often, but worth it.
  
From old tapestry upholstery fabric.
Gave a nice Victorian charm.
 
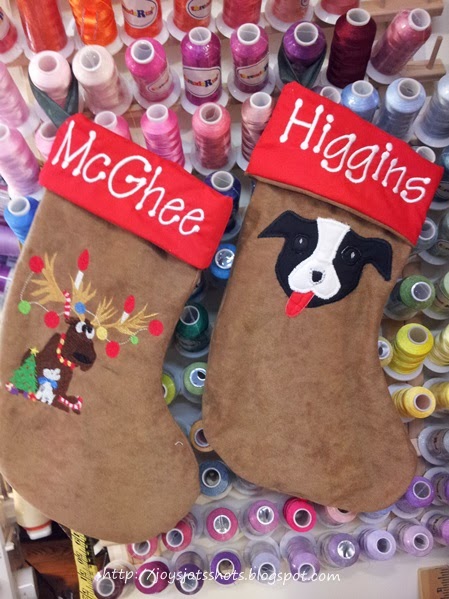
 And, finally for my Grand Dogs!
The moose embroidering to me, resembled McGhee the lab
and resembled the mess he would get into.
 
************************************
Sharing at several Linky Parties.
Thanks to the FREE programs:
possibly used for this post
GIMP for cropping & other digital effects
 Photoscape for downsizing & watermarking photo
PicMonkey creating collages used on this page


Wednesday, December 18, 2013

Wordless Wednesday #78~ Idaho Springs

Idaho Springs, CO
Drive by shot from the Interstate
*

Cuts from photo above


***************************************************
  All pics in this post are untouched
Sharing at several Linky Parties.
Thanks to the FREE programs:
possibly used for this post
GIMP for cropping & other digital effects
 Photoscape for downsizing & watermarking photo
PicMonkey creating collages used on this page

Tuesday, December 17, 2013

Gift Wrap Idea ~ Brown Paper Stockings


Got this idea from this month's "Country Living" magazine. 
   Get out your sewing machine and wrap those small gifts!


 I used the basic shape from the pattern I posted recently. 
The paper is postal wrapping paper.
Found this roll on a yard sale adventure.
 Zig Zagged around the edge and over the eye lash yarn.
Got the yarn marked way down at Hobby Lobby last Sept. 
If it's red and sparkly, I grab it thinking "Christmas!"
The yarn was doubled, leaving the loop for for an ornament hook.

I can imagine these in a much smaller size for wrapping things like jewelry or money.
The article in the magazine showed a star shape.  
A candy cane or simple triangle tree would work as well.
************************************
Sharing at several Linky Parties.
Thanks to the FREE programs:
possibly used for this post
GIMP for cropping & other digital effects
 Photoscape for downsizing & watermarking photo
PicMonkey creating collages used on this page

Friday, December 13, 2013

Making Christmas Stockings - Free Pattern & Tutorial


 Featured @ Marvelous Mommy
Been putting my embroidering machine to some good use making stockings for several people.  Here is my tutorial and free stocking pattern for you to download.


I do keep a journal to help me remember how I will do or did things.
Embroidery placement twisted my brain a bit.


I can't tell you how many times I forgot to add the hanger.

Through the opening, turn the stocking right side out.

Stuff the lining inside the stocking.

To join the edging.... 
You need to leave an inch overlapping the seam.
Start stitching about 2 inches after the seam.
Stop about 2 inches before you get back to the seam.
This gives you room to pin the 2 ends together and seam them together.

 Then flatten out the edging, start stitching (back stitch) where you left off to where you began (back stitch).

Turn right side out, and turn down the cuff.
For examples of stockings made from this pattern,
please go to:

************************************
Sharing at several Linky Parties.
Thanks to the FREE programs:
possibly used for this post
GIMP for cropping & other digital effects
 Photoscape for downsizing & watermarking photo
PicMonkey creating collages used on this page


Wednesday, December 11, 2013

Wordless Wednesday #77~ Time to Renew Season Tickets?


***************************************************
  All pics in this post are untouched
Sharing at several Linky Parties.
Thanks to the FREE programs:
possibly used for this post
GIMP for cropping & other digital effects
 Photoscape for downsizing & watermarking photo
PicMonkey creating collages used on this page

Monday, December 9, 2013

The Indian Outfit


Before Thanksgiving, I got a request to make a couple of Indian Outfits for a Sorority/Fraternity event.  She brought me the pattern and the beautiful fabric.  It was fun to get back to making a "real" dress again.  It had been a while.


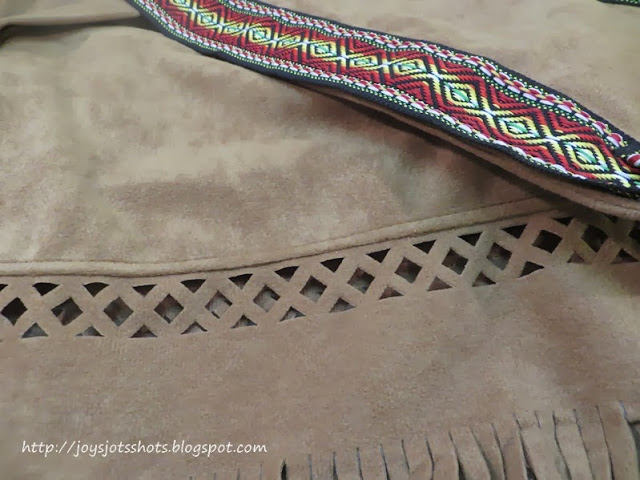
Down the side of the yardage was the trim which I cut off and added to the bottom of the dress.
The pattern included the belt.  She bought the beautiful braid I used to embellish the belt.
I hope they had a great time.
I'm telling you, the girl needs to be a model. Isn't she beautiful?
************************************
Sharing at several Linky Parties.
Thanks to the FREE programs:
possibly used for this post
GIMP for cropping & other digital effects
 Photoscape for downsizing & watermarking photo
PicMonkey creating collages used on this page