

I decided to make some for Christmas gifts, because I love how you don't have purse strings, but if you need hands free you can use the bow to dangle the clutch on your wrist.
Also, I wanted the clutch large enough for an electronic pad, or even a book for those that still use books. Then when you don't need to carry those items, it can be a smaller purse by folding it.


*****************
Here is my version of The Clutch Purse
including how I inserted the zipper.
*******************
Cut 2 pieces each of outer & lining fabric to size you desire.
Your electronic pad might determine this?
Don't do as I do, do as I say- Also cut interfacing if fabric isn't stiff.
However, I wanted to be able to fold, so I would not use a stiff interfacing.
My cutting board is marked in inches.

Depending on your dimensions for cutting the pieces above,
Cut 2 pieces of fabric for bow slightly wider,
but tall enough to go to what will be fold line on purse.
Sew the 2 pieces right sides together along long edges.
Center of bow is 1½ inches X 3 inches, folded right sides together,
stitched long edge, turned, whip stitch ends together turning under raw edges,
slide on bow hiding the seam in the back. Tack stitch to bow so it won't slip.
(or cut and make bow however you like. A tube of fabric, with the seam in back, would also do.)


Inserting Zipper
I used a zipper smaller than the width of the clutch.
To cover the ends, but a strip of fabric about as wide as zipper.
Place & pin as shown below.


Unzip zipper about an inch.
You'll see why later.


Start stitching where edge of fabric of clutch meets zipper tab.

Now you are about to see why you need to unzip the zipper.
Notice how the puller distorts the straight sewing line?
I am not using a zipper foot, but rather my normal foot.
I use the left of my foot to following on of the rows of designed stitches to help me sew straight.
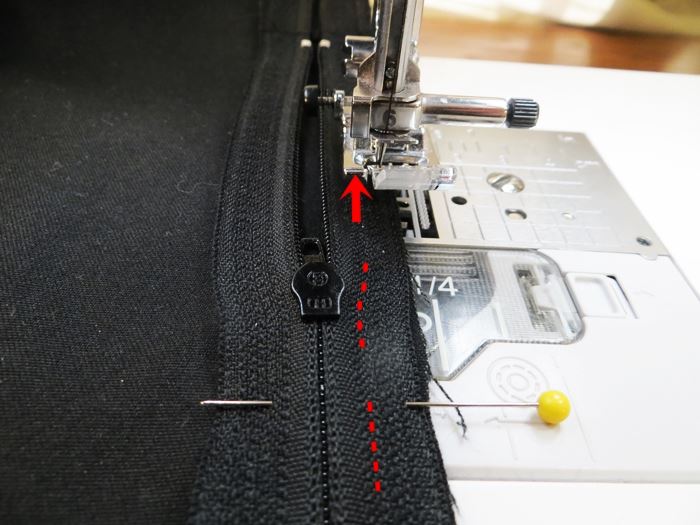
Stop with needle down.
Raise the presser foot.
Zip the puller behind the foot.
Lower presser foot and continue.


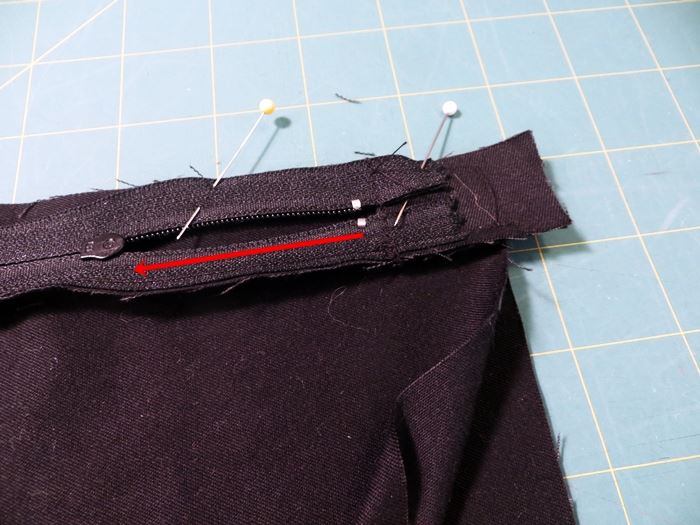


To stitch, turn over so you can see the former stitching and stitch along stitch line or just inside.


Sewing Clutch Together
Stitch the lining first.
Fold in half the zipper and tab as shown below.

Start stitching just below the edge of the zipper.
DO NOT sew the tab together.
About 1/4 inch will not be stitched as shown below.
I started with a zero length zig zag stitch.


Oops, I didn't stop stitching soon enough. Arrows show where I should have stopped.
When stitching the outer layer together,
Fold the zipper as shown and start stitching below the zipper as shown below.
After stitching is complete, trim the tab off to meet edge lining and main fabric.

I like to start at the zipper on both sides for a neat finish.


A long aluminum knitting needle is my favorite turning tool
to poke out corners and smooth out seams.

Tack the opening of the lining closed however you desire.
 Zipper Pull
One more thing left to do.
Add a piece of scrap fabric to your pull to make it a bit easier to grab and zip.

Tie it in a square knot...
Right over left, left over right.


**********************************
Thanks to the FREE programs:
possibly used for this post
GIMP for cropping & other digital effects
Photoscape for downsizing & watermarking photo
PicMonkey creating collages used on this page
