Lesson 12- Putting the Quilt together
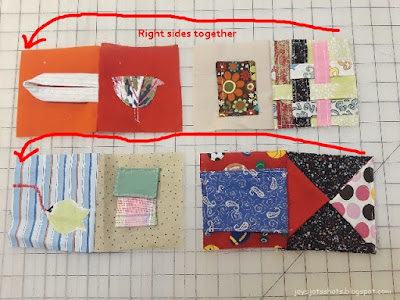
Choose 8 or 12 blocks and arrange in rows of 4.

Sew together as this video demonstrates
After squares are sewn together,
Cut a piece of fabric the same size as your quilt top.
This will be called your "backing" because it will be the back of the quilt.
Make ties by cutting two strips 2½ in x 36 or width of fabric.
Sew them together like the loop in Square 5 above.
Decide what will be the top edge of your quilt.
Lay one end of one tie in upper right corner side. Pin this end
Lay the end of the other tie in upper left corner side. Pin this end.
Lay the lose ends of each tie in the center of the quilt top. Don't want them to get sewn into the edge of the quilt.
Lay the quilt with pinned ties right side up.
Lay the backing on the quilt right side down, so that right sides are facing each other.
Pin around edge. Mark a 6 inch space along the bottom where you will NOT sew.
Sew all around the edge, taking pins out before your machine comes to them. Remember don't sew about 6 inches at the bottom.
After
sewing, reach hand inside 6 inch opening and pull the inside out. After
straight edge all around, topstitch the opening to close.
Here are more pictures to help demonstrate how to put quilt together.


No comments:
Post a Comment
Have a JOYful day!
Leave a comment or an email if you like.
I will enJOY either.
Please LEAVE YOUR EMAIL ADDRESS if you need a reply.