Saturday, November 6, 2021

Quilt Block 138B ~ Seven Shirt Quilt- Cutting Quilt Pieces

 
Seven Shirt Quilt Along- Part 2

This is a series of the process of making a
quilt from 7 men shirts.
An idea from "The Thrifty Quilter" blog that has been deleted from the internet.
 
This post shows how the pieces of shirts are cut efficiently to provide
the pieces for the quilt top.

 
After pieces have been rolled up,
be sure to press and if you like,
 starch the pieces.
Yes, I pressed my pieces even though they don't look it.
 
 
First the light shirts are cut apart.
Use the SLEEVES AND FRONTS.


Take BOTH SLEEVES ,
cut FOUR 6½ in squares.
**
I cut across 6½ inches apart
being careful to measure first (twice) to make sure 
I can get 2 blocks out of a strip.
Then cut the strips into 6½ blocks.
 
From ONE shirt front 
cut FOUR 6½ inch squares
and the rest in 2½ inch strips with ends squared.
 
MY shirts were about medium size.
From larger shirts you should be able to get 4 squares,
and maybe more than one 2½ inch strips.
 
Cut other shirt front
into 2½ inch strips.
Square off ends
where strip is no longer 2½ inches wide.

For easier rotary/ruler cutting,
fold shirt carefully and place fold
on line.

Because I couldn't get the fourth block
from the other shirt front,
I cut one block from this shirt front
which is the reason for seeing the 6½ inch wide strip first.
After the square was cut off the end of this wide strip (not shown),
the rest was cut in strips.
 
Repeat cutting blocks and strips with other light shirt.
Each shirt should provide TWELVE 6½ squares.
 
Set aside rest of light pieces including the backs.
 
Next take the DARK SHIRT FRONTS AND YOKES
and make as many 2½ inch strips as possible. 


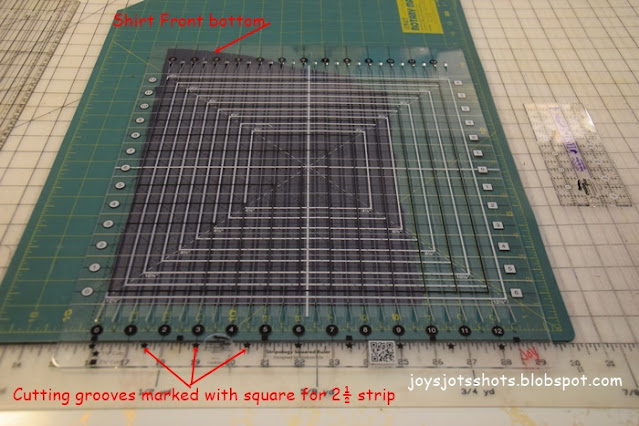
I LOVE this ruler for cutting strips.
I should have folded this shirt front to fit inside the
cutting area of the ruler.
The shirt tail is at the top of the picture so I could align
the straight front of the shirt.
 

 After you've cut up the light fronts and sleeves,
and the dark fronts and yokes
this is what you have.
 
You are now ready to start piecing the main part of the quilt top. 
That will be Part 3 next Saturday.
enJOY!


You might also be interested in
Potholders from these shirts


Wednesday, November 3, 2021

Wordless Wed 317~ New Fabrics of Old


Tuesday, November 2, 2021

Tues Tutorial~Adult Bib from Shirt

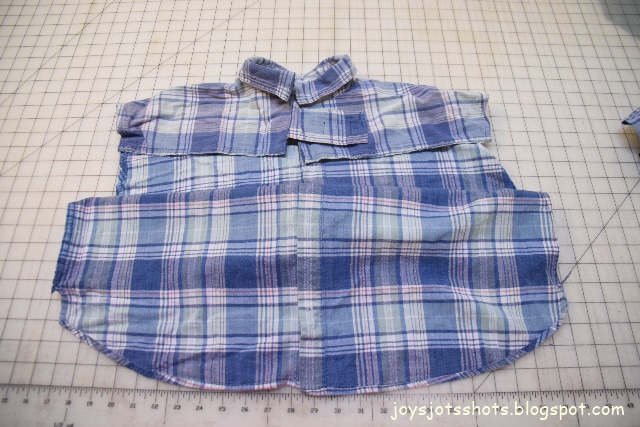
This bib was made for a friend taking care of her husband, because someone sent me the idea via social media and she wished for one.  After making one, I quickly decided we need them for our couch dining. 


******************
Tuesday Tutorial
******************

Note: When cutting apart shirt, pay attention to leave
the original seam features on the body of the shirt so
you don't have to again finish the seams
for future wear and tear. 
 
 
Cut through single layer
 to make sure you are cutting
 along edge of flat felled seam.


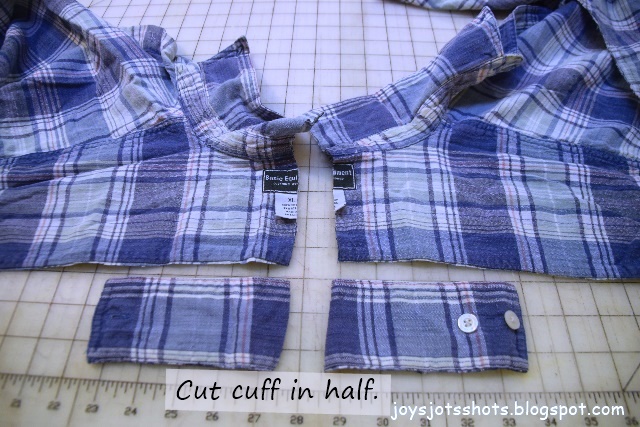
I also removed the tags.
 
 Next prepare the back yoke and collar area
to insert the cut center of the cuff
in between the layers.
Take out enough stitches so that 1/4 inch of this edge can be turned under.

Your yoke band seams may come apart?
If so you will topstitch them by single layer.


Turn under 1/4 inch on the other side
and top stitch as well.
Cuff is not insert of this side.
 You might want to use the original button hole for a closure.
If so, just use the button on the cuff and attach to the other side
after you have turned under and topstitched.
However, I decided the Caregiver should have the ability to
quickly remove the bib
so I chose hook and loop tape.
 
I also decided the Caregiver might appreciate
if her husband doesn't spend time unbuttoning this bib.
Button the shirt front,
topstitch along the edge.
Notice the generic foot is used and 
 the needle is moved to the far left
so the foot could go by the button.
The zipper foot did not ride evenly. 
Double check to make sure all buttons
are tight and cannot easily be removed
if a patient is using the bib.
Nursing homes might require they be removed.
 
View of back closure area.

**************
Side Note:

History has told us that people used aprons to protect their clothing.  It was tradition in my family when I was a child to have Sunday dinner (big lunch) after church. Women in a hurry to get food on the table, quickly grabbed their apron to cover their Sunday best. That reminds me of the job of this adult bib.  

I might want to eat chili sitting on the couch. Adult bib please.  You might be a Caregiver for an adult. Grab the bib.