My church needed Welcome Flags to replace the sun faded flags we had. I made 2 flags and they both were free because they were made from scraps people had given me, or I had leftover from another project.
******************
Tuesday Tutorial
******************
I started by raw edge piecing the background with scraps. The method that is similar to my Bottom of the Barrel Tag Making. I just overlap the fabrics and stitched. A 20x16 inch backing for flag was cut from some broadcloth curtain type fabric. I have a roll of it I bought years ago. The wrong side shows mostly white which is the side I have to appear on the back. The backing was then used as a pattern to trim the collage piece to size.
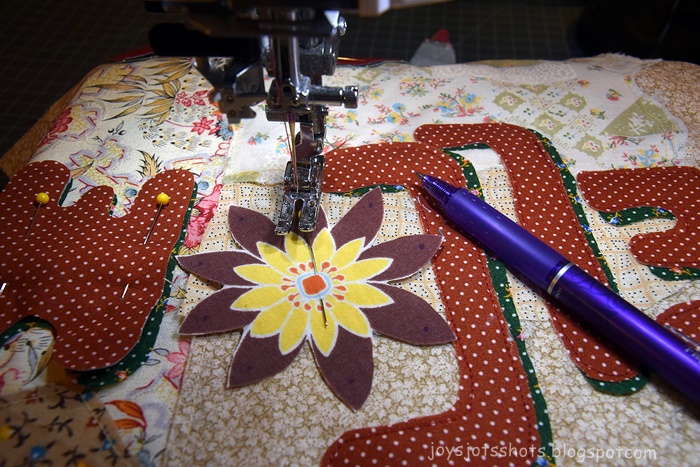
I start free hand cutting my letters by deciding the height and width they should be to put the wording across the flag. In this case I decided on 3.5 x 3 inches pieces of fabric to cut letters. I did a double cut to make shadowed letters as I did on THIS flag. The back of these red pieces of fabric have light weight iron on interfacing.
I still had to do some artistic maneuvering and cutting to make them all fit. Then the leaves. These were pieces from another flag so they aren't duplicates. I did trim the backgrounds after I stitched.
Raw edge stitch around all pieces.
Only need to stitch around top layer of letters.
Place the front and back pieces right sides together, and stitch across what will be the top of the flag.
To make the pole channel:
Unfold.
Press open seam.
Mark as shown above.
2 inches from each side of seam
Then cut in 1/2 inch.
Pin if need
Stitch along folded edge as shown below.
Turn rights sides together. Pin all around except for the area turned under.
The turned under area is the opening for the flag rod.
Do not pin about a 6 inch opening across the bottom. You will NOT stitch in this 6 inch area.
The flag pole opening is not large enough to turn inside out.
I put double pins to remind me where not to stitch.
Turn the piece inside out through the 6 inch opening.
To finish making pole channel,
top stitch across 2 inches down from the top edge.
Top stitch 1/4 inch from edge Across the top
All around flag from bottom of pole channel opening
the the bottom of the channel on the other side.
Being sure to turn under the edge of the 6 inch opening.
The top stitching will close the 6 inch opening.
Then your flag is ready to hang. you see the greenery that Mr. G planted a few years back.
He does live on, even at church.
Another flag made with a different leaf designwhich I do like better.
So get your scraps out and make a FREE yard flag.
***************************
Shared @


 My church needed Welcome Flags to replace the sun faded flags we had. I made 2 flags and they both were free because they were made from scraps people had given me, or I had leftover from another project.


 I was asked to make more Shirt Memory Pillows. However, these were not shirts but rather tshirts, sweat shirts and sweaters. I used the serger to make these. In this tutorial there are some serger tips.