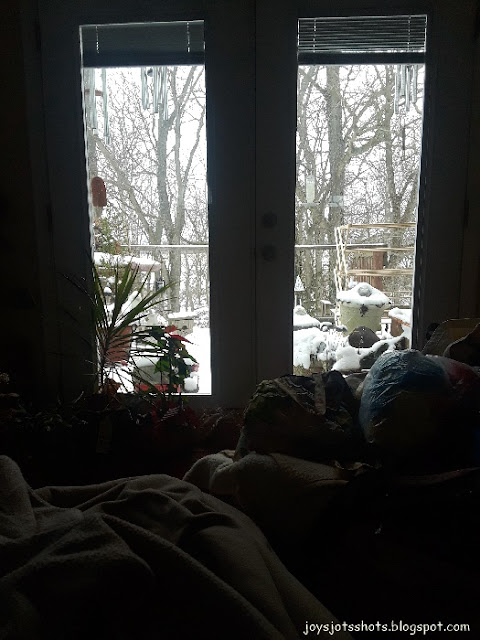
A single step found on my deck Christmas morning?
Wednesday, December 28, 2022
Wordless Wed 338~ Snow Canceled 2022 Christmas and A Single Step?
Be sure to see Web View for More-- Posted by
JOY @ http://joysjotsshots.blogspot.com/
at
4:31:00 PM
1 comment:

Saturday, December 24, 2022
Quilt Shot 152~ Christmas Cardinal
| 12 ½ inch or 12 inch finished |
Many of us around here have heard the old saying, "A visit from a red bird (Cardinal, our state bird) is a visit from a loved one that has passed on." My friend who has lost her son, decided this year to decorate all out for Christmas with Cardinals. Her home is beautiful!
I decided to add to her Cardinal Collection by making a Cardinal block pillow for her. There are several pictures online, but I only found one set of directions and found them to be confusing, especially cutting instructions which had me cutting to many pieces and not large enough. After trial and error, I decided to write my own directions, especially for my future reference, because I have a different way to make the half square triangles than the directions I found. enJOY!
You will need
- 12 White 2½ inch squares
- 8 Red 2½ inch squares
to make using the Magic 8 Method below
7 Red/White Half Square Triangles (HSTs)
7 Green/White HSTs
You will have 1 HST of each leftover.
I printed it a few years ago and placed on my bulletin board for quick reference.
Square 2½ inch square
- 1 Black 3¼ inch square
- 1 Yellow 3¼ inch square
- 1 White 3¼ inch square
- 1 White 3 inch square
- 1 Red 3¼ inch square
- 1 Red 3 inch square
You actually need 2 7/8 instead of 3inch above, but 3 inch is easier to measure.
It will be slightly larger than the HST created?
Pieces will be squared to 2½ inches.
Draw line from corner to corner.
Stitch less than 1/4 inch from line.
Cut apart, press
Place a Red 3 inch square on top of a Red/Black HST
On Red square side stitch corner to corner across the Red/Black seam as shown below.
Place a White 3 inch square of top of the White/Yellow HST
On White square side stitch corner to corner across the White/Yellow HST seam.
Pay attention where the Black and Yellow pieces are located.
Square the final pieces to 2½ inch squares.
I had to do them over.
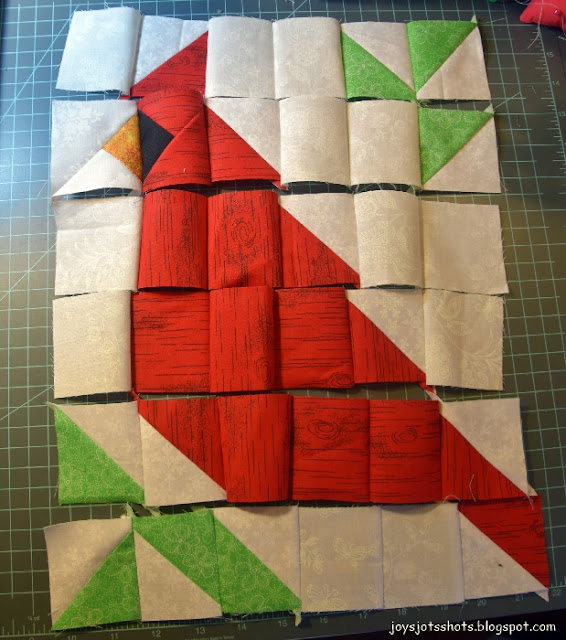
Lay out all the pieces as follow.
There are 6 rows and 6 columns.
You can now see why the position of the yellow and black pieces is important.
I like to stitch rows first.
Add a 2 to 2½ inch wide strip,
depending on the size of your pillow,
to the sides,
then top and bottom of the block.
Add an envelope back as shown here.
Don't forget to sign and date.
Merry Christmas to Donna
Shared @
Handmade Monday #307 on Sum of Their Stories
Inspire Me Monday 565 on Create with Joy
Creative Crafts Linky Party #126
Be sure to see Web View for More-- Posted by
JOY @ http://joysjotsshots.blogspot.com/
at
8:27:00 AM
5 comments:

Wednesday, December 21, 2022
Wordless Wednesday 337~ Wreaths Across America 2022 @ Camp Nelson
Be sure to see Web View for More-- Posted by
JOY @ http://joysjotsshots.blogspot.com/
at
2:36:00 PM
2 comments:

Thursday, December 1, 2022
Thoughtful Thurs 190~ Ending the First Super Sad Year
Yesterday, around 6 am was the anniversary
with the help of the
nurse in the COVID unit,
I said Goodbye via the phone
to my dear Sweet Mr G
who was actually non-responsive
as they had just removed his ventilator.
One of the nightmares that still haunts me
was not being allowed to be by his side
holding his hand
I was recovering from COVID so I felt no danger
and couldn't understand my denial.I will always wonder if our loved ones that left us this way,
would have lived longer or survived
had we been allowed to be by their side,
or did they feel abandoned and give up?
Its been a very long sad year full of nightmares,
and thus, little sleep.
I miss him deeply and still have a hard time catching my breath.
during his last days and moments.
His funeral and burial was on D-Day.
Be sure to see Web View for More-- Posted by
JOY @ http://joysjotsshots.blogspot.com/
at
9:56:00 AM
2 comments:

Tuesday, November 15, 2022
Tues Tutorial~ Grocery Bag Keeper
*****************
Tuesday Tutorial
******************
Size of single layer of fabric only has to be about 18x22 inches.
Whatever scrap piece of fabric you have
that's close to this size.
turn under quarter inch,
then an amount the width of elastic
you decide to use.
I had some 1/2 inch wide elastic,
so I turned under another 1/2 inch.
Iron this turnover
to make stitching easier.
when fabric is turned over.
Stitch down end
within the future seam area.
Fold over elastic,
stitch along folded edge
being sure not to stitch into elastic.
Keep elastic free.
Stitch along edge.
Notice the elastic is not close to the edge.
Stitch down the end of the elastic
at the other end.
just turn under about 1/2 inch.
I was able to leave the selvage edge,
otherwise another 1/4 inch would need to be turned under.
Next time I will do this edge first
so it will be flatter work
because doing the elastic edge first
gathers up the fabric.
Top stitching detail.
right sides together and
stitch a seam of your desired width.
I chose a quarter inch serger seam.
A french seam would be good.
Place fabric WRONG sides together,
Stitch 1/4 inch seam, press
then place right sides together and
stitch 1/2 inch seam to hide the seam
you just made.
Cut a piece about 2½ x 9 to 12 inches long.
Turn ends 1/4 inch in.
Fold long edges to center,
Topstitch along both edges.
Stitch end of each to each side of seam
at the end with NO elastic.
These are the ties to hang the Keeper.
I'll make myself one.
Be sure to see Web View for More-- Posted by
JOY @ http://joysjotsshots.blogspot.com/
at
8:00:00 AM
2 comments:

Subscribe to:
Comments (Atom)

 k
k


