Sunday, March 30, 2025
Sun Best~ Provoked Thought: Proverbs 31:31
Be sure to see Web View for More-- Posted by
JOY @ http://joysjotsshots.blogspot.com/
at
8:00:00 AM
No comments:

Friday, March 28, 2025
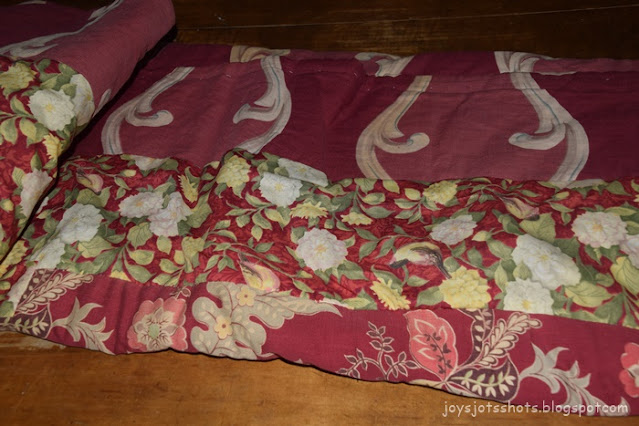
Fun Fri~ Finishing Clell's Quilt Repair
I started Clell's quilt repair a few weeks ago.
I finally got it finished.
Clell said he didn't know who gave him this quilt,
or anything about the quilt inside.
All he knew is it was very hold.
I'd say by our ages,
the quilt is probably almost a 100 years old
because it was given to him years ago.
It was VERY heavy.
The scraps used were curtain scraps.
Be sure to see Web View for More-- Posted by
JOY @ http://joysjotsshots.blogspot.com/
at
8:00:00 AM
1 comment:

Tuesday, March 25, 2025
Tues Tutorial~ Thread Sketched Doggie Bday Card
It's been a very long time since I've done any Thread Sketching. For the longest time, I have put off the goal of making sketches of my grand dogs for my daughter.
I finally made a quick one for a birthday card. She had just posted a picture of her beloved McGhee because his adoption day was St. Patrick's day, March 17, thus he was named McGhee. He's a most loving dog, has a lot of patience which has been used to mentor other dogs he has outlived. We all think a lot of McGhee.
Here's how I made the card.
*****************
Tuesday Tutorial
******************
She took this picture to capture the look in his eyes. I could not duplicate that, but here's how I tried.
First I uploaded the chosen picture into the free software program called GIMP.
After GIMP is opened:
1. File
2. Open
3. Search for picture you want to use
4. If it asks you to convert, yes.
5. Use the crop tool in the left column to select the area of the picture you want to use.
6. Press enter to complete crop.
7. at Top, Filters, Edge Detection, Edge, ok
8. at Top, Colors, invert,
9. If you like it, file, save as, choose jpeg
10. Image, print size, choose a size that will fit your card or whatever you're making.
11. Print
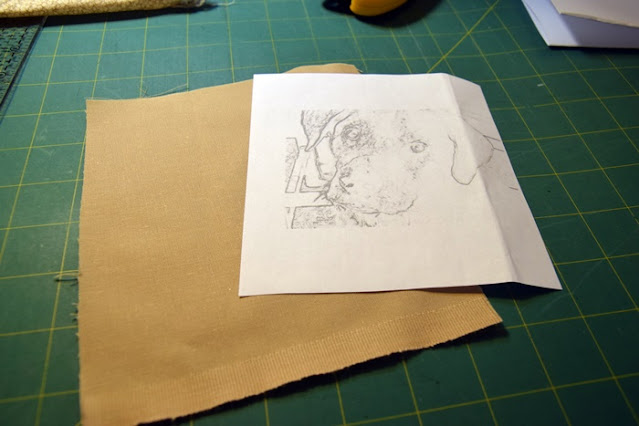
A light board helped. The printout was taped to the board.
A heat sensitive pen was used to trace the picture on the fabric.
embroidery stabilizer.
A stitch line was used all around
to old the fabric instead of pins.
To hold the piece under the free motion needle,
I used this glide that I got for about 5 dollars at a second hand store
last year when I went to Florida.
The small size fit perfectly over this piece.
The underside had rubber grips to hold on to the fabric.
It was very easy for my hands to hold.
Before trimming threads.
I decided to add another line to the jaw to make the snout broader.
Can you see the difference between the two above?
Then I decided to make a cloth envelope,
since I would be able to hand it to her.
In the picture below,
you can see the practice piece I first did.
I stuck that in the card too.
Just a simple fold over.
Shared at the following Linkies:
Sum of Their Stories Handmade Monday
A Stroll Thru Life769th Inspire Me Tuesday
My WeeAbodeTuesday Turn About
Be sure to see Web View for More-- Posted by
JOY @ http://joysjotsshots.blogspot.com/
at
8:00:00 AM
2 comments:

Sunday, March 23, 2025
Sun Best~ Provoked Thought: 1 Peter 1:24
Be sure to see Web View for More-- Posted by
JOY @ http://joysjotsshots.blogspot.com/
at
8:00:00 AM
No comments:

Tuesday, March 18, 2025
Tues Tutorial~ Half Square Triangle with Folded Corner Ruler
Recently, I have learned how to use this ruler.
First, you cut the width of strips that your HST is to be unfinished. So if I want a 2.5 inch HST, cut a strip 2.5 wide. Really no calculating required. That's quick.
(I got a new mini ruler at a local quilt shop close out sale. So I had to try it out with scraps.)
The sales lady was going to show me how to use it, but I just didn't have time. I told her I'd read the instructions. So months later, I pulled out the directions, read the first lines and told myself, that's not a short cut if I'm still drawing lines and the ruler is just used to cut. So I stashed it away and thought, "waste of money."
During the past week of my many hours of You Tube watching, I came across someone demonstrating how to use a popular brand name corner clipper ruler like this one. Then the light bulb came on. Thought I'd give it a try.
Align the bottom of the ruler along the bottom straight edge.
line up on the 2.5 inch line along the bottom edge of the strip.
Be sure to square the line going up the cut edge you just made (on right).
The top flat edge also goes along the edge of the strip.
Notice, NO PENCIL line is drawn.
Then the clipped corners the ruler helped make,
guide you in sewing the quarter inch seam
using your favorite quarter inch foot or
guide on your machine.
Then something that saves more time,
is the fact you don't have to trim
if you cut accurately and
sewed the seam accurately.
Of course I can't throw away the scraps.
They had to become a smaller HST for the scrap box.
So there is another HST technique to add to the
Pieced Half Square Triangles Resources
I still don't understand why it's called
"Folded Corner"?
I never folded a corner?
Be sure to see Web View for More-- Posted by
JOY @ http://joysjotsshots.blogspot.com/
at
12:58:00 PM
2 comments:

Subscribe to:
Comments (Atom)


