I had done thread painting, (the featured post right now in the side bar, or find in the Sewing Tutorial group above) so with a ton of fabric scraps I decided to try portrait collages. After doing a lot of online and library research and then much trial and error, below is a picture/word story of the path I took.
Max is one of my grand dogs.
I've been waiting for a year to reveal this project. It was made in 2020 for a Christmas gift, then we weren't able to attend Christmas.
******************
Tuesday Tutorial
******************
I printed out a frontal portrait I had taken of Max. Then gathered various material and scraps. I had wondered what I could do with this odd piece of fabric. Turns out it had many of the shades and textures I needed. Very little other pieces of fabric were needed. (I will warn, black fur is hard to define dimension. Thank goodness Max had some gray hairs. I don't think I could have done this when he was younger with cold black hair.)
You'll need a clear translucent sheet. Thickness doesn't matter. Mine happens to be heavy not flimsy. I had saved this piece from some packaging a long time ago. I use it to practice quilting designs.
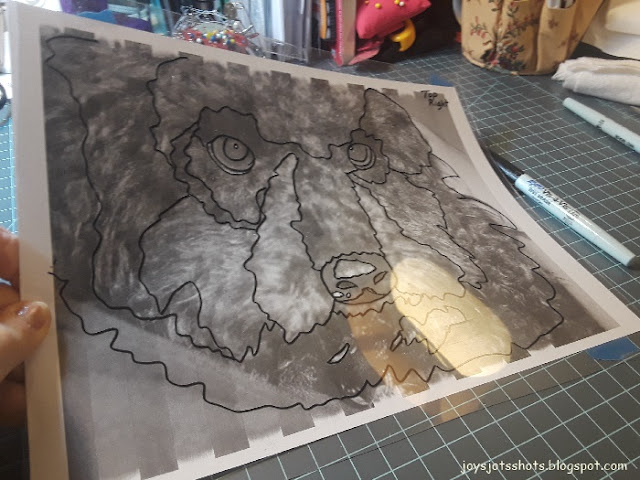
With a black or dark white board marker, draw lines on the clear sheet to mark where change of color happens. Use one continuous line as much as possible. This will train your eye to see differences in shades of color and textures.
I felt the first try didn't mark enough differences to show details. So I took a damp paper towel, wiped clean and tried again.
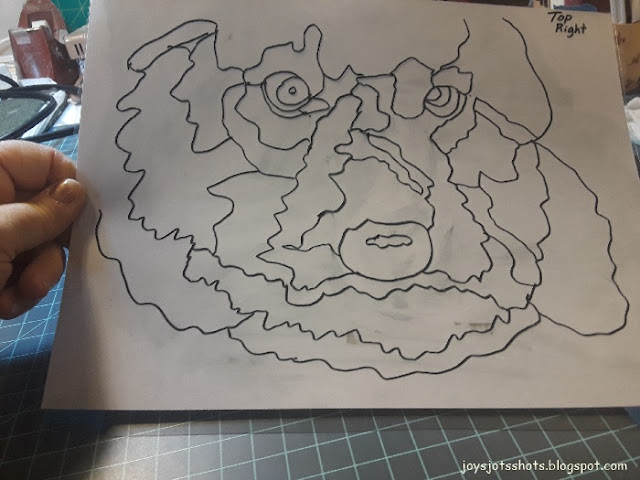
When you take away the picture and just look at the outline,
you can judge better if you have enough sections for detail.
Tracing on white paper helps too.
This probably would have been ok? But, I felt this one added more depth to the eye area to show he had a prominent nose.
The reason for the black or dark white board marker is to be able to trace onto paper. It would have been nice if I had a light board. (I'll rig one when I come across the right free supplies.)
The wax side of freezer paper is taped to the front side of the picture with painter's tape attaching on the back as shown.
The picture is traced onto the paper side of the freezer paper with pencil so lines can be erased for changes and so they are thin for cutting.
Then I determined a coding system to label each piece so that when the pieces were cut apart, I would make sure they were put back in place.
Each piece was numbered (circled) then each piece showed a connect line with neighboring number of piece. (clear as mud?) Maybe study the close up picture below to cypher the code.
This final sheet was taken to the copier to make about 3 more copies. I knew I would cut one up, use one for a reference and keep the master copy intact for future use perhaps. The third is always a "just in case" copy.
I first started cutting the pieces apart. I quickly decided it wasn't necessary to cut all the pieces at once. For me, it would be too confusing.A piece of iron on interfacing as large as the pillow was laid on a soft surface. I used a multi-folded towel.
The wax paper piece was ironed on to the right side of the fabric. In the case above, I want piece number 30 to cut from this black fabric. So only the #30 area is ironed onto the black fabric.
Since pieces are so small, the little iron you see above is used to iron the section and some of the area around it to the fabric. This makes for much easier and accurate cutting. The freezer paper removes easily from the area that wasn't cut.
The reason you see the surrounding fabric above, I went ahead and cut out some pieces but decided to keep the surrounding background because it held pieces inside in place better.
One artist I researched said she always started with the eyes. I didn't, but I did give a lot of attention to creating the details of the eye. I agree with the artist in that I think it does bring "life" to the portrait. I also feel the nose on animals is another point of interest and character. There is a sparkle there too.
As pieces were cut,
some slightly larger, they were pinned in place. What you don't see going on here is the reason for pinning. The trial and error of lifting the freezer paper off and seeing how the pieces worked side by side. (I can't believe I didn't get a picture of the most important part of the process.)
It was rather mind warping in that pieces were mostly compared to the one next to it. Mostly dark and light was compared for shadows.
Notice notes were made as to pieces that needed to be dark and very dark.As stated above, some pieces were cut larger. Pieces were overlapped or trimmed but never cut to be butted up against each other so that no gaps occurred. Remember, iron on interfacing was used, so none could peek through to mess with the iron.
Time for a reveal.
By this time, I have fabric scrap piles everywhere!
As the pins and freezer paper are removed one by one, each piece was ironed onto the interfacing. School glue was used on super tiny pieces the hand iron couldn't reach.
Notice the tweezers. They were used a lot.
Before the entire piece was ironed, the iron on interfacing was cut away from the piece. The piece was pinned to the background. I used the mending foot to free motion stitch around every possible piece. Notice how those white pieces on the black eyes and nose adds so much sparkle.
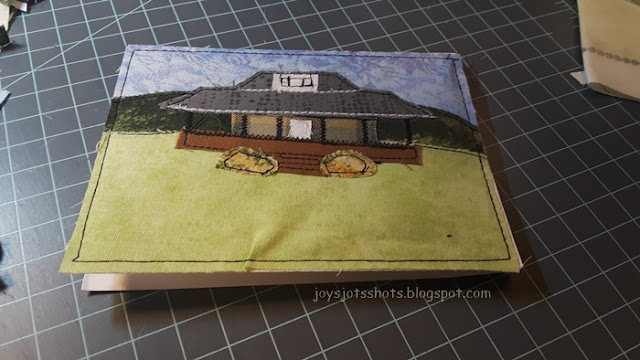
This piece of work was used on a pillow.
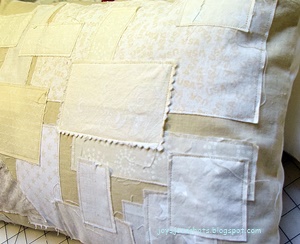
Back of pillow
This post was featured on
Handmade Mondays on