Monday, June 30, 2014

Purse Organizer/Coupon Holder: Unique Construction

    I enJOY making these, because of how they "turn out" like magic.  The way you lay the fabrics together is a unique process to other ways I've seen.     
     This is a revised tutorial from one I wrote in 2012 as my very
first guest post which was for Whimsy Couture.
  That post is now hard to find, so I'm reposting here, because I think you might like to try out this new technique.


**************************

You will need 4 pieces of fabric:

It will take less time to sew than to pick out fabrics and cut.
Just follow this picture labeled tutorial.


Now the magic happens. This "turns" into a coupon holder.

 Turn it over and see the 2 pockets.


 Three organizers together can help keep all those membership cards, a pack of batteries for hearing aids, receipts & all those other small items from floating around in your purse.
These are hand size which makes them easy to move from one purse to another.

Whimsy Couture has been revised and offers several free tutorials and free patterns.
******************************
This post has been featured @
Be A Crafter xD
 **********************************
Thanks to the FREE programs:
possibly used for this post
GIMP for cropping & other digital effects
 Photoscape for downsizing & watermarking photo
PicMonkey creating collages used on this page


Friday, June 20, 2014

Published in "Sew it All" Magazine!

     I'm so excited & honored to have an article published in a national publication!
     All thanks to a friend, Pam, (Mr. G's Sis) that believed in me and encouraged me.


***************
It is a rather new publication.  You'll find the article in Volume 8 which is now on sale.
 I actually got a 2 page spread.
        The title of the article was supposed to have been Waist No Time because it's about 3 quick steps to making a skirt without a pattern featuring a fast elastic waistband application.
        I had posted the waistband application on this blog a couple of years ago, and last year explained the 3 steps of the skirt construction for a doll skirt in a child's sewing lesson.  
        This magazine is chocked full of sewing ideas & projects.  If you'd like more information about this great magazine, please go to the Sew it All  supporting site which offers patterns for the magazines projects for free.  My article doesn't require a pattern.  You will find the cutting directions in the article.
         Yes, I made both skirts in the spread.  I think the models made them look better!
        I hope I have the opportunity some day to write another article.
        Also, thank-you Maggie for helping me proof the article.
**********************************
Thanks to the FREE programs:
possibly used for this post
GIMP for cropping & other digital effects
 Photoscape for downsizing & watermarking photo
PicMonkey creating collages used on this page


Wednesday, June 18, 2014

Wordless Wednesday #94~ Lunch?

*****************
 Attending these Linky Parties:
 Better in Bulk studio waterstone Wordless Wednesday on Tuesday   NanaHood.com
Also:
****************
Thanks to the FREE programs:
possibly used for this post
GIMP for cropping & other digital effects
 Photoscape for downsizing & watermarking photo
PicMonkey creating collages used on this page

Monday, June 16, 2014

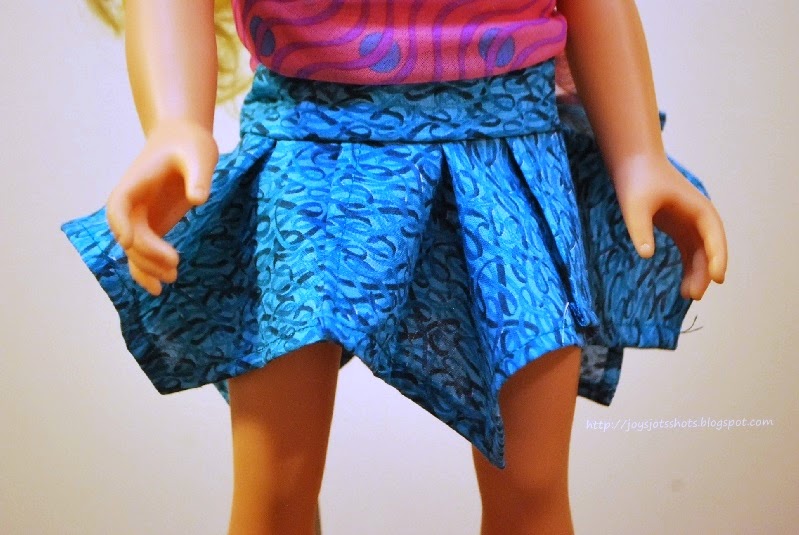
Handkerchief Skirt from Squares for 18" Doll ~ Tutorial & Cut Out Directions

      Some time ago I saw a video on It's Sew Easy on how to make an adult size handkerchief skirt.  I adapted it for the 18 inch size doll.
          Below you will find the cutting directions and tutorial for putting the skirt together.


********************************************

First cut out 5 five inch squares of fabric.  For fun you might like to try a combination of various colors?
 For the waist band cut one 3 x 11½ inch strip.  You might like a more narrow 2 inch waistband.  Also, measure the waist of your doll to see if 11½" would fit best.
        Do a double fold hem edge around each 5 inch square.  Make the fold no more than ¼ inch each fold.  Actually the more like a rolled hem the better looking.
        Then cut out a 1 inch corner.

Take waist band piece.


Stitch from end to end of waistband.
 Stitch a piece of hook and loop tape at the end of the waistband for easy closer or button/button hole would work.
 Done!

**********************************


Thanks to the FREE programs:

possibly used for this post

GIMP for cropping & other digital effects

 Photoscape for downsizing & watermarking photo

PicMonkey creating collages used on this page

Saturday, June 7, 2014

First Day of the Rest of My Life ~ Beginning 4th Year of Retirement

Today I start a new book, because its the anniversary of the first day of my retirement, although teachers really don't feel like they've retired until the first day of the school year you don't teach.
These journals simply contain the itinerary of each day since retirement.
It does not include thoughts, if I can help it.  That's in another journal.
On the inside cover, I note major events such as purchase of automobile, electronics & appliances with their warranty dates.

You may think this is silly, but I can't tell you how many times I have gone back through these books to see when I did something.  For example, last Dr. appointment or auto service.  I do usually include approximate time of day and foods that I eat, new medicines, and how my body felt. These notes help me find out if there is a pattern of food/medicines causing health problems. 
 
This book does go on our trips.  I have already enJOYed looking back to where we have been and it does amaze me.
 
I've also read this type of activity helps keep your brain active which is something one wants to do to ward off dementia?
 
This ritual occurs at bedtime along with my devo and my thought journal.... if I have any thoughts for the day.  I had read this helps put your mind at rest and makes for a better sleep. 
Hmmmm...... depends on the day you have to write about.....I think.

**********************************
Thanks to the FREE programs:
possibly used for this post
GIMP for cropping & other digital effects
 Photoscape for downsizing & watermarking photo
PicMonkey creating collages used on this page


Friday, June 6, 2014

Friday Foto #12 ~ Grand Granduation

My first Grand Daughter will graduate today from high school!
UNBELIEVABLE that it happened so FAST.................. 

**********************************
Thanks to the FREE programs:
possibly used for this post
GIMP for cropping & other digital effects
 Photoscape for downsizing & watermarking photo
PicMonkey creating collages used on this page

Tuesday, June 3, 2014

Wordless Wednesday #93~ Enough Time?

*****************
 Attending these Linky Parties:
 Better in Bulk studio waterstone Wordless Wednesday on Tuesday   NanaHood.com
Also:
****************
Thanks to the FREE programs:
possibly used for this post
GIMP for cropping & other digital effects
 Photoscape for downsizing & watermarking photo
PicMonkey creating collages used on this page