Tuesday, March 31, 2015

Butterfly Accents for Tea Time Dress


Used Joan Hinds' Pattern from 30 Minute Doll Clothes

You can still see a demo of the dress on the Sewing with Nancy site.
 I had a great time using 1/8 of a yard of fabric to make this quick dress.
It's also very easy for little hands to put on the doll, as it wraps around the doll.
When I made the second dress, I had the idea to use what little fabric was left over to make butterfly accents for the dress.
I had only 2 pieces this size left over. (square= 1 inch)
Left the edges raw.
I first tried to stitch a running stitch to gather, but couldn't hold this fabric together while I attached to dress. So, just gathered on a pin as you see here. Pinched with my fingers as I ran a stitch with the sewing machine through the center attaching to the dress.
The lined jackets didn't take much fabric and were super easy.  
If you finish the inside seam correctly, they can be reversible.

          I have downloaded a lot of patterns for these dolls and bought a few patterns on sale for $2 or less.  So buying this book was a super splurge for me, but I'm glad I bought it because the patterns are very simple & super easy, take very little fabric and therefore are very enjoyable to make.

 ***********************
Thanks to the FREE programs:
possibly used for this post
GIMP for cropping & other digital effects
 Photoscape for downsizing & watermarking photo
PicMonkey creating collages used on this page
 Attending these Linky Parties:

Monday, March 23, 2015

Folding Tissue for Small Tissue Holders

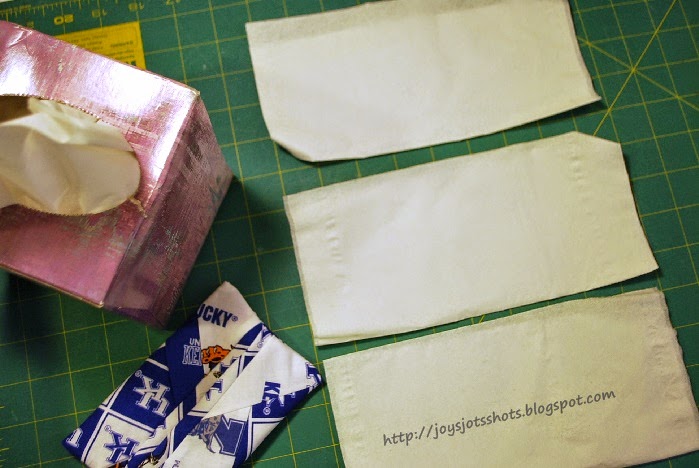
          A few posts back, I showed how I did some impromptu sewing to make the fabric for this tissue holder. Some have thought you had to buy the little tissue packets to put in these holders, which you could, but you could also save some money and use the tissue you already have at home. 
          It doesn't matter the size or shape of your in house tissue box.  The tissue in these boxes are all the same size and folded the same way.  You can use these tissues in these little holders & you don't have to put them in one at a time.  You can stack these large tissues so they will pull out leaving the next tissue available to pull out.  Here's how:

Step 1:  Lay out about 6 tissues leaving folded like they came out of the box, usually in half.

Step 2: Fold each tissue fan fold fashion to about the width of the holder. Notice below the bottom is pointing the the left and the top to the right.

Step 3: Line the tissue up as you see below.

Step 4:  Open each as you see below.

Step 5: Slide the second in row over the top of the first as seen below.

Step 6: Fold the left flap of the first as seen below.


Step 7: Fold the remaining right part of the second over as seen below.


Step 8:  Take the top flap and open to the left as seen below.

Step 9: Lay tissue #3 as you did in Step 4 above and continue Steps 5-8 until you have as many tissues stacked as necessary.

          Then you are ready to take the entire stack and stuff into the tissue holder.
          Pull out the first flap. Now, when you pull out a tissue, the flap of the second tissue will follow.

 ***********************
Thanks to the FREE programs:
possibly used for this post
GIMP for cropping & other digital effects
 Photoscape for downsizing & watermarking photo
PicMonkey creating collages used on this page
 Attending these Linky Parties:
 

Wednesday, March 18, 2015

Wordless Wednesday #120 ~ Late Drive Thru @ Ritch Grissom

@ Ritch Grissom Memorial Wetlands
Melbourne, Florida, USA
Since our first trip to the Wetlands was cut short with a blown water hose,
we returned.  This time it was later in the day.
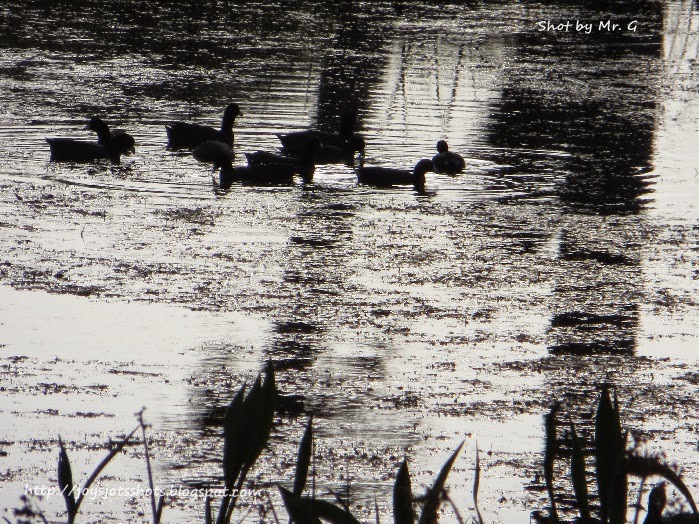
These are some images I caught with my Galaxy 4 phone.
******
Looking through these shadows, does your eyes play tricks on you.
Do you think you see an alligator or other animals?


*********************
The following are shots taken with the little Canon Sure Shot by Mr. G
These were taken on the first trip.


Thanks to the FREE programs:
possibly used for this post
GIMP for cropping & other digital effects
 Photoscape for downsizing & watermarking photo
PicMonkey creating collages used on this page
 Attending these Linky Parties:
 Better in Bulk studio waterstone Wordless Wednesday on Tuesday   NanaHood.com

Tuesday, March 17, 2015

New Sewing Toys or Souvenirs

                When I go on vacation, I usually try to visit a fabric/quilt store and find myself a souvenir which is something on my "sewing room wish list." I've usually brought home 1 item per trip. I over did it this time, but as Mr. G noted, we were gone an extra long time- 4 weeks! 
               One of the many reasons I love Florida: Many, many sewing/quilting shops!
          This little baby wasn't really on my list, because I really didn't need another iron. However, when I actually saw it, my hand automatically felt relief. Sure enough, this little iron feels much better in my hand and for my wrist. I used it yesterday to make some doll clothes, and oh, it felt great!  I know it will work great on quilt squares.
Meanwhile, I will still keep my cordless iron available for larger projects
and 2 ironing boards.
Oh, the baby iron is also a steam iron.
I still use my big chalk blocks, but wanted a multicolored marker.
I chose this chalk holder that came with different colors of chalk.
Again, easy for my hand to hold.
It is hard for me to cut in different directions with scissors or rotary cutter, so I've had to start turning the fabric which isn't always an accurate process. Consequently, this item has been on my wish list a long time. Finally, found it at a store that was priced less than online.
          I've started taking Mother & Dad's clothes and creating memory quilts. I have several blocks made from Dad's shirts, and had gotten to the point where I needed to square the blocks. My 12 inch square ruler was a bit confusing with all it's marks. I decided I would like a smaller ruler. Even though this is a "Twist & Stitch" ruler, I thought it would easily accommodate squaring different size blocks.
Notice the cut lines inside the ruler.
 Yes, I did already have plenty of rulers.
This is the reason I never started scrap booking. I'd probably go nuts.


I had bought one of these last spring, and apparently never made it home with it.
I suspect I will find the first one now.
Got frustrated getting my ironing surfaced messed up with residue from iron on interfacing.
I probably could have found a better deal on thread online, 
but found an independent sewing store I wanted to support and price wasn't bad.
I had used the white embroidery thread far faster than any other color.
     This book was on my "Splurge list", because I had downloaded a ton of FREE 18inch doll clothes patterns & acquired a few marked down patterns at the store & yard sales.  Being on the "splurge list" means I was expecting not to pay full price, but find it in a used bin someday.  So why did I pay full price for this book? Again, I wanted to support that independent dealer & I had never seen this book, not even at the major book store. I had decided it may take a very long time before this shows
ed up for a $1 somewhere.  After using it yesterday, I'm SO happy I bought this book. 
     The tube turner has probably been on my wish list for about 12 years. I hadn't bought it, because I hadn't been able to find it.  The online price was breathtaking. I know they come in at least 3 different sizes, but for the price, I can manage the larger straps using my knitting needles as a turner. The very small size was hard for my hands to manage.
         A store in New Smyrna even had a basket offering up to 5 free used publications. I found 2!  One of them is still being sold at a famous chain store.

         Bringing home all of these items, and finally putting them away yesterday made me feel like Santa Clause had visited me.
 ***********************
Thanks to the FREE programs:
possibly used for this post
GIMP for cropping & other digital effects
 Photoscape for downsizing & watermarking photo
PicMonkey creating collages used on this page
 Attending these Linky Parties: