Pages

Church Pages

Fav Blogs

Thursday, June 29, 2023

Thoughtful Thurs 195~ Sewing Room Triangle

  
When planning a kitchen many of us have heard of the work triangle, stove, sink and fridge. I've set up 3 sewing rooms in my life and other sewing situations. I have often realized there are also 3 working centers, I think for sewing while sitting: Cutting, Sewing and Pressing. 
 
 Am I the only one that thinks this? Is there another center others also consider?
 
When I need, I can rotate the pressing board 
and slide over on top of the cutting surface.

 
My small pressing board that has a wool slip cover I made 
has to be moved to my right when the cutting area gets covered. 
I can set it in the pull out drawer on my right
 or push in the drawer and
set it on top of a wooden TV tray to the right. 
 After some discussion I started on the FB group
Sewing ROOM Ideas,
I realized I needed to relabel the "cutting" area to "workspace",
because really the major cutting for quilt fabrics and garment making
happens on the big cutting table.

It's sort of still a work triangle.
When I'm at the machine,
that little triangle is still important to me.
When I need to set up the ironing board, 
I either can lay it across the end of the cutting table,
or squeeze it in where I stood to take the picture.
So the aforementioned cutting space is not big enough to cut 45 inch wide fabric.

I can mark fabrics.
Snip blocks apart.
Use the scissors for trimming
and the unfortunate seam ripping takes place here
 because of the good lighting.
Quilt blocks are placed here
or garment pattern pieces in waiting.
 
There was mention in the discussion group to have a design wall. 
I don't have wall space for that, or even a place to clip one that I could reach.
Walls are chopped up too much.
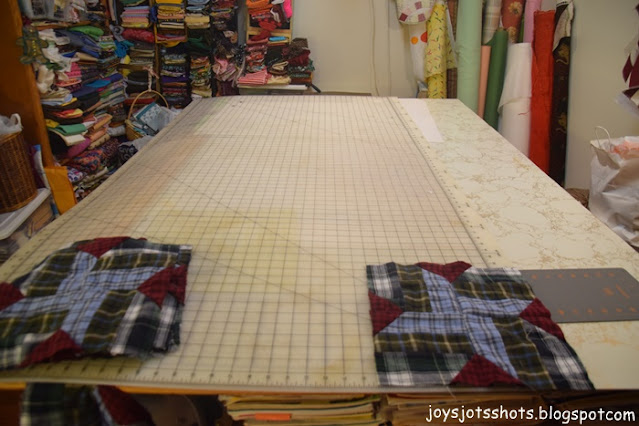
So I have a large cutting mat simply laying on top of a
 piece of laminate that was used on walls years ago.
I slide them apart to widen the table big enough to hold 
up to five 12 in blocks across. 
 
I physically can't handle a king size quilt if I did have the space.
This is the size of memory quilts I make.
Good for wrapping up on the couch.
*********
What are your thoughts about a working triangle?
Does it even matter?
I just think it makes sewing work go more smoothly. 

Shared @


Tuesday, June 20, 2023

Tuesday Tutorial~ 2nd SIL 2023 Bday

First let's get it straight, he's only the 2nd son-in-law because they were the second to get married. He's the father of my grandson that got this card of the farm truck and the husband of the daughter that has gotten this & this landscape cards of the beautiful scene of their bottom land.


1. I start with the card made from card stock which is half of a sheet folded in half. I need this for my prototype to help me size things.

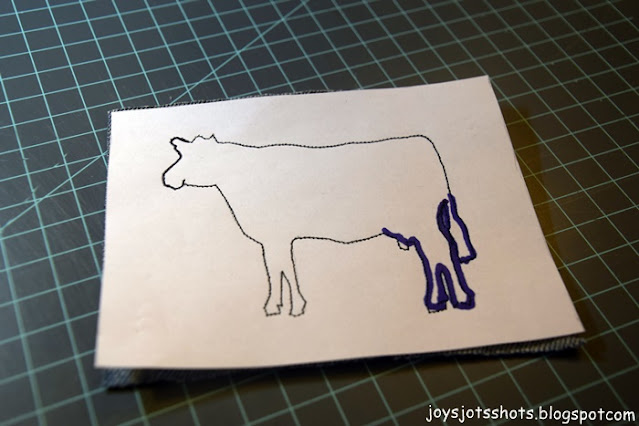
2.  I research free blackline clipart sites for an idea. Using the free Open Office Word Processer, I copy and paste and resize the image to fit 1/4 of the sheet. Then it's printed on scrap paper as with this blue marked paper.  Today's clipart came from ClipArt Best.

3. I like to keep a folder of the printed clipart in the event I might make another card, so I trace the part of the image I'm going to use.

4. I cut a piece of background fabric the size of the card in number 1.  This was a piece from an old pair of jeans used hard in farm work. Yes, it's clean and ironed fabric.

Started to trace with marker and decided I was losing details. I was in too much of a rush to trace again, so I made it work. Placed the piece over the blue jean fabric and sewed along the line. I don't free motion, but still use a generic machine foot.

    Most is easy to tear away.


Some is not.

This fabric was ironed several times to no avail.
I proceeded to try to stitch more lines in the tail.
Today I tried this machine foot to stitch around the edge to apply to card front.
It worked better.
These clipart outline cards are the easiest and quickest to make.

My great grand son's card is next.
Hope I inspired you. 
 
Shared @


Thursday, June 15, 2023

Thoughtful Thurs 194~ Broken Foot? Less than Year Old Janome M7


 Notice the metal rod? My often used single foot on my Janome M7 broke in less than 1 year from buying the machine. I took it in the next day, April 18 to replace it. I'm still waiting to receive the new foot. Apparently, taking the ride from overseas?

What are your thoughts?

Monday, June 12, 2023

Monday 143~ Drinking Water in Style


This photo takes me back to about a year ago when I got brave enough to go to one of our frequently visited restaurants alone. I went about 4:00 in the afternoon. Reported 1 person eating please. I was seated in the empty bar area. I asked for my usual water with no lemon. The lady brought me this. The thought occurred to me, "Was she trying say, "Congratulations, You've made it this far and accomplished another step?"" 
 
 A toast to "Eating alone without him." Believe me, it's a hard first step.

Wednesday, June 7, 2023

Wordless Wednesday 347~ Broken Rose Stem Brings Home Cheer

From a broken stem on my Knock Out Rose Mr. G had planted.
Cut and brought to the kitchen table to enjoy.
Just happened to catch the morning sprinkles.


Saturday, June 3, 2023

Quilt Shot Block 157~ Facets: Another Memory Quilt


Facets
 
Spring 2009 edition
Over my many years of looking at quilts,
I've seen this block multiple times
in other books and magazines.
3 flannel shirts, 2 dark, 1 light and 1 red PJ flannel pants
Cut in 2½ inch strips
Sewn end to end.
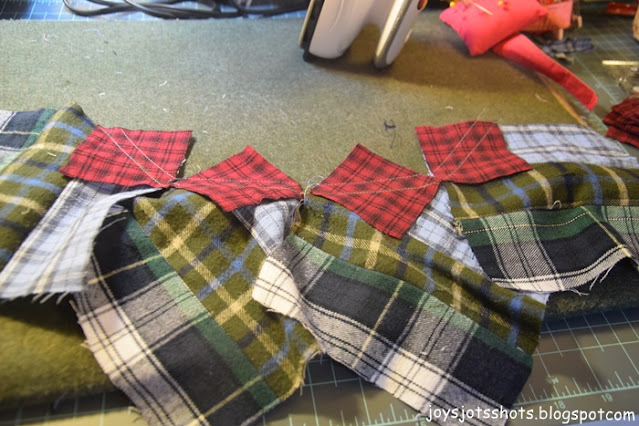
The red was cut into 2½ inch squares.
Strips stitched into one continuous strip set

Warning: Well worn flannel shirts will have warped weave,
so cutting on straight grain is very difficult.
One has to have a mind set not to worry about it too much.
Some tricks like using this Creative Grid ruler helps.


I didn't think it mattered where the red squares went, but it does.
On my light blue, it goes in upper right.
Then the opposite corner.
When you have leftover triangles,
its easier to stitch them together while attached
to make half square triangles.
Don't know if they will be used?


Preview with Photoscape Combine Tool


Shared @