Pages

Church Pages

Fav Blogs

Thursday, October 31, 2024

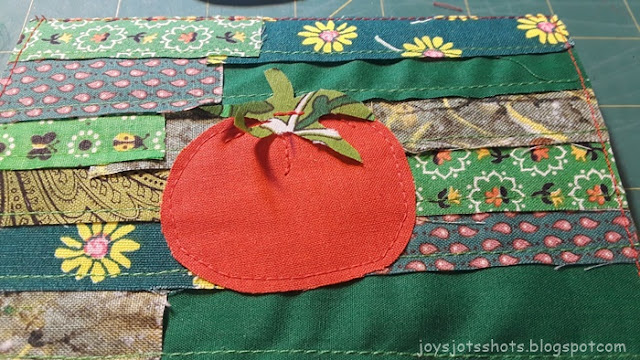
Thoughtful Thurs~ Thank-you for Yummy Tomatoes Card


All this past summer,
a couple at church
as been bring their tomatoes
to share with those of us
that crave fresh tomatoes
during the summer.

I would take the leftover tomatoes no one took,
or sometimes no one would take any
so I grabbed them.


Now that we've had a frost
to bring an end to the tomato season,
I felt it was time to give them
a much needed 
Thank-you card.


Like always,
I leave the inside blank
for my personal handwritten note.
*********
Here's more card ideas:

Shared @
 

Tuesday, October 29, 2024

Tues Tutorial~ Friend Green Tomatoes

 
When it comes to a lot of things I'm a very, very simple person. While some people are still dressing their hamburger, I've eaten half of mine. 
Fried Green Tomatoes is another simple thing. No egg wash for me. Just as well since egg prices have sky rocketed again. They are around 4$/dozen here. I'm not paying that. 
 
 
Fall was the time of year we usually ate green tomatoes when I raised a garden. We rarely had them in the spring, because we were patiently but anxiously waiting for them to become red or maybe yellow. However, come fall, we'd watch the weather closely and pick them the day before the first frost. So now at my age, I start craving a tart, tangy fried green tomato.  

This is how my Depression Era raised Mother made them. I guess you can say I'm still doing a lot of things my grand mother and probably great grand mother did. Why change it if it works? These are delicious to me. All you need is plain cornmeal.
 
 
After a good wash
slice them about quarter inch (cm) thick.
Salt them a tiny bit to start bringing out more juices.
Be patient, wait a bit.....go fix some iced tea?
 
Lay them in PLAIN cornmeal....no Jiffy stuff.
Press each one a bit with the back of a fork.
Wait a bit. ......get the ice tea glasses fill with ice?
 
Turn over the slices, and press again.
Wait a bit. ....Heat the oil just covering the bottom of the frying pan.
Pull out some more patience
and fry these on medium or lower heat
until they turn a bit soft and golden brown.
You don't want burnt or hard raw tomatoes.
 

I enjoy these tart, tangy bites with beans and mashed potatoes.
Around here, many restaurants are using a slice of them on hamburgers. 
I gotta say, for some reason,
those made during the summer just aren't as tangy.
Maybe they need to be picked as green as possible?
 
I hope you can get your hands on some.
Mine were given to me by a friend in church.
I never find them for sale in the grocery.
I know nothing about the tomatillo.
I wonder if they would fry up and taste the same?
 
A few years back,
my friend shared how she canned green tomatoes
so she could enjoy FGT
throughout the winter.


Saturday, October 26, 2024

Quilt Block 182~ Stella's QOV Paper Pieced Star Block

  
Our QOV member, Stella
used her Quilt Design Software 
to create this Paper Pieced block
for our workshop.
For my no tear Paper Piecing method for this block 
go HERE

Tues Tutorial~ QOV No Tear Paper Pieced Star

Stella didn't know if this block already had a name.
I've done some research and
cannot find the block anywhere. 
So without knowing if this already has 
a designer's name on it,
and I don't have Stella's permission,
I can't share the pattern yet.
My work space at the workshop.

The block I completed at the workshop.
A second block design to go with this star
 will be shown later.
 
This star is made with blue corners.
While other stars like the one below 
I made at home
have red corners.


This shows how the sections go together
to make the stars.
You will be amazed how these stars 
along with another block 
come together to make the 
overall design of the quilt.
I can't wait to show you.
 
Shared @


Thursday, October 24, 2024

Thoughtful Thurs~ QOV Card from Paper Pieced Scraps


This card is made from the scraps
from the work done in

Tues Tutorial~ QOV No Tear Paper Pieced Star

 One of the Quilters that attended that workshop
had surgery the following Monday.
So I made this card to send as a 
"Get Well" Card.
Of course I usually leave the inside of my cards blank
so they are 
"All Occasion" Cards
I can grab at a Moment's notice.


To see other cards I've made over the years
Go HERE


Tuesday, October 22, 2024

Tues Tutorial~ QOV No Tear Paper Pieced Star

       Recently our QOV had a paper piecing class to start a group quilt in honor of a member that passed away a couple of years ago. She had come to be know has the Paper Piecing Queen.  It was said she would come to Sit and Sew on Saturdays with her sewn pieces and sit and rip out papers the entire time. THAT is the very reason I don't like sewing through the foundation paper. I LOVE the No Tear or No Rip method. I get to skip that part AND save and reuse the foundation paper again and again.  
 
 
*****************
Tuesday Tutorial
******************
 
I have tried to explain this method before, but I wasn't satisfied with my tutorial, so I'm trying again with more detailed pictures.  I'll link the old tutorials at the end of this post. 
 
Our class did teach the traditional foundation paper piecing method.  
They said I could come and do my own thing. 
 Here's what I did:
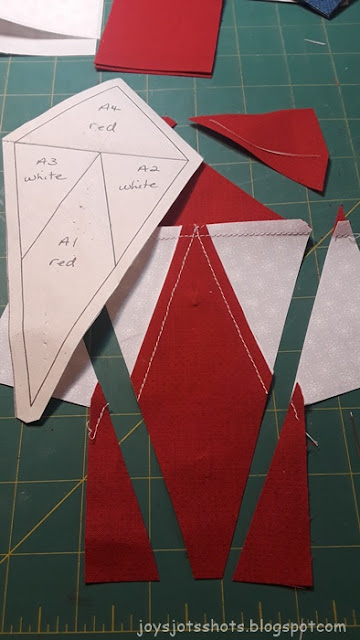
The left is the paper foundation and the right is the fabric.
 

Lay wrong side of fabric to back of foundation paper.
Pin or glue in place.
 Some people use freezer paper
 and iron onto the back of the fabric.
Notice where section 1 & 2 are located.
Fold back directly on the line
of section 1 & 2.
Using a ruler or the add-a-seam ruler,
cut away leaving quarter inch seam.
Take the white fabric
looking at the print (right) side of fabric
Slide under the work piece


allowing right sides of each fabric to face each other.
Line up edges of seam.
Here's THE TRICK I really love.
When you fold back the pattern piece you are adding,
make sure the fabric on the back side lies exactly under folded piece.
Sometimes you might have to hold it up to a light to see the back fabric.
When you eventually unfold both,
they will lay on top of each other. 
The picture below may better show you
how the paper piece is laying over the white fabric?

The most important tool for this method is the
Edge Seam Foot.
The blade of the foot guides you closely along the fold
which has to be done to be accurate.
You MUST move your needle to the right of the fold.
 
Turn over and press

 
Repeat on the line between sections 1  & 3.
Fold on line
Cut Fabric
 Right sides together
Stitch
Press

 
Then across top for section 4
Press
Fold on line
Cut quarter inch seam 
Add red fabric right sides together
Stitch
press.
 
Sometimes you might find you'll want to pin more pieces,
or glue to hold the pieces.
Freezer paper does a good job of holding the foundation in place.
after you press.
Now that all pieces are sewn,
it's time to trim on the trim line
a quarter inch from the seam line.
Instead of laying the edge of the ruler on the trim line,
lay the ruler's quarter inch line on the 
foundation's seam line as shown above.

 
Then the FUN part,
where you smile
and think of everyone else that's 
taking extra time to rip out papers,
YOU REMOVE THE PINS
in my case 2 pins.
Done.
I'll reuse the pattern to make the rest.
I'll probably be able to make about 12 sections
before this piece is worn out.


Then sew the sections together
with a quarter inch seam.

I used at least 3 pins to hold
each seam very steady.
I even get the nerve to 
slowly stitch over the pins.
Hint: if the part of the pin you sew over
is under cloth,
it seems to work better.

Notice how the middle pin
is right at the seam.
It's hard for me to match slanted seams,
but this works well. 
It's a Kaye Wood, from PBS a while back, technique.
She put pins on each side of the pin holding
the exact spot of the seam
So the top or bottom fabric wouldn't slide.


You'll get to see resulting block, 
designed by one of our members
on this Saturday's Quilt Shot Block.
You'll see how accurate the seams met.

Shared @


Monday, October 21, 2024

Quilt Shot 181~ Elkhorn Creek Quilt Guild 2024 Quilt Show, Part 1

The 2024 Elkhorn Creek Quilters Quilt Show was held in the fall this year during Georgetown's Festival of the Horse. It was displayed at the Extension Office for about a week. In the past it had been during the spring at the Museum for about 6 weeks.  
From this Quilt Show, the Bourbon Trail Challenge quilts and My Favorites have already been posted on this blog.  There are 27 more quilts, so they will be shared in 3 posts of 10 or less. This post is Part 1.
 
EnJOY


Also see

Bourbon Trail Challenge quilts

My Favorites