Pages

Church Pages

Fav Blogs

Saturday, September 18, 2021

Quilt Shot 137 ~ Sunbonnet Sam


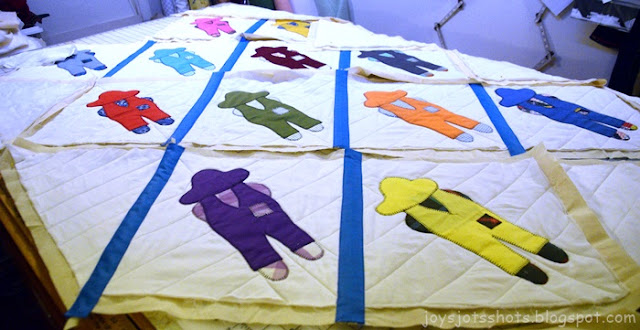
Sunbonnet Sam
Pieces cut by Mrs. Carter
My cousin's other grandmother
Quilt made by Yours Truly, Joy B 
 
 **********************************************

Machine Applique Technique

 
I was handed a box of these cute cut outs. Some would call this Overall Sam.
In the box there were also some Sunbonnet Sue cutouts, so I called him 
Sunbonnet Sam.

I cut the white blocks from one of my Dad's sheets.
Very soft feeling.
I machine blanket stitched the underlying pieces first.


*********************************

Quilt as You Go Technique

Different marking tools were used,
but were either hard to remove or
in the case of heat sensitive pins the black and red both,
left a light red mark.
So pressing was the answer.
 
To equally mark,
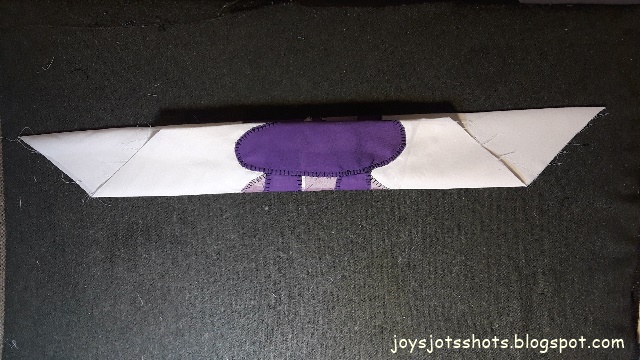
the square was folded as shown


Then backing was cut at plus 1 inch larger all around.
Batting was cut same size as block.


As you can see the lines went across,
and no matching was of concern.
 
**********************************************************

Sashing Technique

 
Trim backing to 1 inch all around

 
Place blocks' backing sides together. 
Pin along seam  
making sure edge of block meets on both sides.
This is why cutting an accurate 1 inch seam is necessary.
  
Stitch seam along edge of block.

Fold under edge of each seam side to the seam.
Now your seam is about 1 inch wide or less.

 
Cut 2½ inch strips.
Press to center.
Folding in half first 
might help to know where center is if you are a beginner.
 
  
Lay strip over seam as shown.

Pin edges away from needle as you sew.
Here, the machine will go down the right side,
then turn around and down the other side.
An Edge Stitch foot is used on the machine.
It has a blade in center,
but center is opened for free range use of needle.

The needle is set to the left at 2.0.
Then the blade on the foot rides along the folded edge of the strip.
Make sure the strip totally covers the folded seam.

The Edge Stitch foot does provide a beautiful stitch that is easy to do.
 
My Note: I didn't feel this method was easier that making a quilt top then quilting.
It was a bit fussy and seemed to take more time.
Maybe because it was my first time to do this method?


 ****************************************
 

Binding

Looking for bright solids to cut into 2½ inch strips.
Sewed together in random order.
Trimmed edges straight and right angle corners.

After binding is pressed in half,
it is fan folded, not rolled,
and placed in the drawer to the right,
because the quilt is on the left.
There are many tutorials that show how the binding can be finished.
 
Made in July-August, 2021


Friday, September 17, 2021

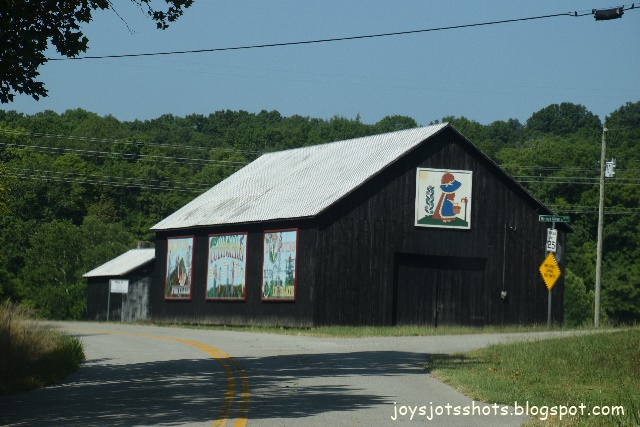
Fun Fri ~ Kentucky Tobacco Barns


North of Stamping Ground, KY
 
Several Kentucky barns today display a quilt block.
You can follow road trails to find these barns in different states.
Funny, I just got done working on a Sunbonnet Sam quilt.
A few barns will display historical or informative paintings about tobacco.
Unfortunately, since most farmers stopped producing tobacco
the barns have been left unattended,
because they can't afford to maintain them.


Tuesday, September 14, 2021

Tues Tutorial ~ Pants/Skirt Expander


       Here's a quick and temporary way to add more room to those pants or skirt that don't fit well around the middle right now IF you wear a long top. These were made for someone that had just begun waiting for a little one to arrive in about 6 months.  Some of you might want to have these ready to use after those wonderful holiday meals?
       You just need scrap fabric, 1/2 inch non-roll elastic and a button to fit the button hole.


******************
Tuesday Tutorial
******************

You'll need 4 pieces of fabric about 2 x 2¼ inches or 2 x height of waist band.
The opening is slightly over 1/2 inch to allow for the 1/2 inch elastic.
Stitch and trim as shown above.
Turn inside out.
 
Insert 1/2 inch non-roll elastic and cross stitch as shown above.
I find this cross effect the  strongest.
Then top stitch all around as shown to add sturdiness.
 
Find a button that fits the size of the pants or skirt's button hole.
Stitch the button on one end.
Or use a button with a post and pin on the button to add more adjustability.
You can use different lengths of elastic.
Here is one that folds under the elastic and holds with a safety pin
so it can be adjusted more.
 
As you see,
on the other end, stitch a button hole to match the button of the pants/skirt.
 
Here is how the "expander" is used.
Of course if the pants/skirts had a hook and loop opening,
you would use a hook and a loop instead of a button and button hole.
 
Now go find a long top to wear with expanded pants or skirts,
and no one will no the secret.


Thursday, September 2, 2021

Thoughtful Thurs 177 ~ A Nana Wedding Heart


A neighbor wanted to do something special for a Bride to Be.
I love the "Bag" Challenge.
It's the "Chopping Block" version for sewing?
 
These were items once used by the Bride's Nana.
The T-shirt was taken down town for the embroidery.
I turned the embroidery piece into a heart.

The friend requested it be laid on the purple towel outlined with a blanket stitch.
Pieces from the other items were crazy patched together for the back.


This friend will pin the piece under the bride's dress
 so the bride will have her Nana & Papaw close by.

I thought it was a very thoughtful idea.