Pages

Church Pages

Fav Blogs

Friday, June 28, 2013

Quilt Block Shot #2 ~ Flying Crow

 Flying Crow Pattern (pdf)
I have found the wonderful site called
"Free Quilt Patterns"
says it links to over 2500 patterns.
So I'll try to connect each one of my quilt shots to a pattern
or create one myself if one is not found

Variation:  Change pattern/colors Variable Star

 
Sharing at several Linky Parties.
Thanks to the FREE programs:
possibly used for this post
GIMP for cropping & other digital effects
 Photoscape for downsizing & watermarking photo
PicMonkey creating collages used on this page

Thursday, June 27, 2013

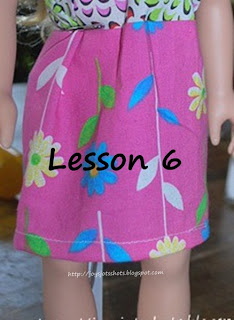
Teaching Beginners How to Sew- Lesson 6 - Doll Skirt

Threading My Way_Featured

Lesson 5 leads right into lesson 6.  Only difference in the drawstring bag made in lesson 5 is instead of sewing the bottom in a seam, it's finished off for a hem.

This is the actual doll skirt my student made.  She did an excellent job, but I didn't want to stress her by taking pictures as she worked.  I did create the skirt for the "Shots Tutorial."

                          ~~ Sewing Lesson 6~~

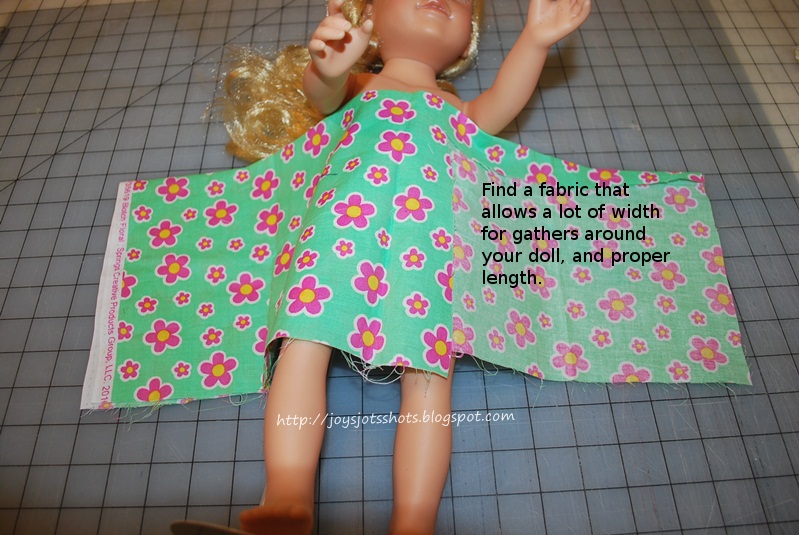
During this lesson, the student will practice turning over & ironing a measured edge, and pinning.  These skills usually have to be practiced by a young sewist. 


Stitch along bottom edge of "casing" just made.  
Find a spot on your pressure foot that will help guide you along this folded edge.
Just like the casing, stitch along the edge of the hem.
It would be ok to stitch through the center of this fold.

Threading the elastic through the casing can be frustrating for beginners.


 Just in case you missed lessons 1-5, here they are:
 

*******************************

Sharing at several Linky Parties.
Thanks to the FREE programs:
possibly used for this post
GIMP for cropping & other digital effects
 Photoscape for downsizing & watermarking photo
PicMonkey creating collages used on this page

Wednesday, June 26, 2013

Wordless Wednesday #57~ Sweet Ride


My new yard sale-ing vehicle?

Sharing at several Linky Parties.
Thanks to the FREE programs:
possibly used for this post
GIMP for cropping & other digital effects
 Photoscape for downsizing & watermarking photo
PicMonkey creating collages used on this page

Friday, June 21, 2013

Quilt Block Shot # 1: 54-40 or Fight

I would like to start sharing some of the quilt blocks I make with a "Quilt Block Shot."  Hope you enJOY!

On the recent 400 Mile Yard Sale, I bought a bag of quilt squares with pieces cut by someone but not put together.  I don't normally pay 5$ for a small amount of fabric, but I gave in here, because I thought it might be fun.  There were 12 squares with their pieces in it's own bag along with a picture of the quilt square (see bottom of the picture above).  It was labeled as quilt blocks of the month, but I found some repeats.


Sharing at several Linky Parties.
Thanks to the FREE programs:
possibly used for this post
GIMP for cropping & other digital effects
 Photoscape for downsizing & watermarking photo
PicMonkey creating collages used on this page

Thursday, June 20, 2013

Guest Post @ Marigold's Loft: Handmade Loops for Buttons/Hooks Tutorial

You'll find the rest of today's post over at "Marigold's Loft" because she asked me to do a guest post ! I'm always honored when someone thinks my work is good enough to share on their blog.  It's very exciting and I enJOY creating the posts, especially tutorials.  I try to stay true to the "jot" part of the title of this blog and not say a lot, but let my "shots" say the most.  This was a tutorial where thank goodness I could use my photography to help me explain.  Hope you enJOY the tutorial and can use the technique.

Please go over and check out the tutorial for making handmade loops for buttons and hooks. While you are there be sure to check out her wonderful blog. If you have your own blog, join her party she hosts on Thursdays and share your tutorials.

Update: This dress had a full dress facing, because it was made for an infant.  Most likely you'll be working with a normal facing, and will only need to just go under the facing to start the stitching rather than trying to pull the knot through the layer of fabric.


Wednesday, June 19, 2013

Wordless Wednesday #56~ Barren River- Kentucky


My softball playing Grand Daughter recently found time to go hunting on Barren River with her Dad for a rainy hunting trip.  I'm guessing turkey season but they do hunt for the coyotes that are overtaking the countryside and becoming a danger to domestic animals & livestock.  I haven't heard of an attack on a person yet, but who knows when that may happen.  Whatever happened to the day when we just had to hunt ground hogs because they dug holes & tunnels big enough to turn over our tractors?  Yes, that has happened to us.  I just hope our guns aren't taken away from us so we can protect ourselves from these coyotes, and hunt for some delicious wild turkey. 

Sharing at several Linky Parties.
Thanks to the FREE programs:
possibly used for this post
GIMP for cropping & other digital effects
 Photoscape for downsizing & watermarking photo
PicMonkey creating collages used on this page
Monday, June 17, 2013

Happy 90th Birthday Aunt Elizabeth

So, I made her an embroidered card.

The embroidering was done on a stiff white denim type fabric, then I used a speciality stitch on my machine to sew it to card stock paper.
Signed it in free motion stitching.
And, sent it 3 days late!

This was my first time to make an embroidery design with several colors.
It was like sitting with my crayons when I was pulling the thread colors.
I really enJOYed this project
& in doing so, remembering the fun times I've had
@
Aunt Elizabeth's home.
One of the best cooks in the country.
Happy Birthday Sweet Aunt Elizabeth!
************************
Sharing at several Linky Parties.
Thanks to the FREE programs:
possibly used for this post
GIMP for cropping & other digital effects
 Photoscape for downsizing & watermarking photo
PicMonkey creating collages used on this page

Saturday, June 15, 2013

Sunday Best ~ Barns of KY Hwy 68


All pictures were taken with my Nikon DSL action setting as Mr. G was driving.
and


Thanks to the FREE programs:
possibly used for this post

GIMP for cropping & other digital effects
 Photoscape for downsizing & watermarking photo
PicMonkey creating collages used on this page

Friday, June 14, 2013

Teaching Beginners How to Sew- Lesson 5 - Little Bag

Now we'll start learning some basic techniques for most any sewing project: Turning under and stitching raw edges.


~~ Sewing Lesson 5~~

Review the term "selvage" which is the edge running on each side of the fabric and is woven so as not to fray.  The white area cut off on this piece is the selvage.

Also, talk about "straight of grain" which is the weave of threads in a fabric.  Good quality fabric will have threads running perpendicular in the weave, and when torn will tear a straight line.  Patterns have a line on them that is intended to be placed parallel to the "selvage." If you pull the fabric from selvage to selvage, you will find more stretch, then if you pull the fabric in it's length.  Of course the most stretch is pulling on the weave in a diagonal manner. 

To Make the Little Bag


After pressing, stitch as close to the folded edge as possible.
Find a place on your pressure foot that you can follow to help make the stitching straight.


Running the ribbon through the casing was a bit challenging for my 3rd soon to be 4th grader.
Make 3 or 4 stitches, backstitch to the pin, continue stitching down the side.

Turn right side out.
Tie the ends of ribbon together in a knot close to the end.
This isn't the neatest finish for this ribbon casing, but will do for this lesson.
Just in case you missed Lessons 1 thru 4, you can find the links below.


Sharing at several Linky Parties.
Thanks to the FREE programs:
possibly used for this post
GIMP for cropping & other digital effects
 Photoscape for downsizing & watermarking photo
PicMonkey creating collages used on this page