The post was appropriately titled In the Beginning. (I have learned since to give my posts a more clear title so google can find the actual projects.) The goal of this blog was to share ideas using more pictures than words, thus jots and shots.
Here is a revised version of the purse organizer, being much larger but less bulky. It's basically patterned after the same concept I use in making my Mug Organizers. Basically just a very large version of the mug organizer.
******************
Tuesday Tutorial
******************
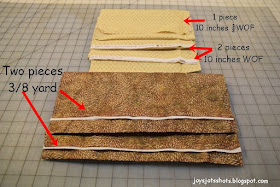
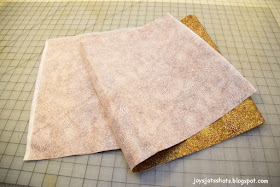
Iron on light weight interfacing completely to one of the 3/8 yard pieces of fabric.
Sew all 10 inch pieces of fabric together on short side,
creating one long piece of fabric.
Fold in half, press.
Cut in half.
Lay pocket pieces with raw edge to raw edge of background piece
that had interfacing ironed on
Divide the pocket section as desired.
Possibly consider what is to be stored.
Mark stitching lines.
An iron away marking pin was used here.
Notice directions pins are placed.
Pins are placed so stitching can start at fold
with a zero zig zag length to tack the top of the pocket.
Back stitch could work as well for this "stress" area.
After zig zag or reinforcement stitch,
continue stitching down the marked line.
Direction is ignored when doing outer edges.
When doing outer edges, it's easier to put all the bulk of the fabric to the left.
Stitch along the bottom (raw edge) with less than 1/4 inch seam,
folding the excess fabric in the center of each pocket.
Notice these pockets have different amounts of space in each pocket.
No super accurate measurements needed.
Take other 3/4 yard piece and place right sides together
on top of pockets.
Pin with pin heads laying outside edges.
Double pin area not to be stitched on end where piece will be turned inside out.
Turn piece over, and stitch around edge just inside edge of previous stitching
of bottom of pocket edge.
Remove pins so not to stitch over them.
The pin heads lay outside the edge so you can see them as you come to them.
Trim corners.
Turn inside out through opening.
Take finger nail or pressing piece along seam line,
then roll edge to seam
and press.
Trim all threads
Top stitch all around the edge.
Quarter in top stitch on end, and
one half inch on long edge.
Quarter inch top stitch is used on end to close opening.
Half inch topstitching is used on long edge because of bulk of folds of inside seam.
Finished.
The organizer is folded to fit the purse.
******************
You'll find this post at several Linky Parties. Please check them out for some great ideas.
Thanks to
Photoscape for downsizing & watermarking photo


What a neat tutorial! Thanks for sharing.
ReplyDelete