******************
Tuesday Tutorial
******************
Due to time constraints and lack of cutting tools for 12 students,
preparation for class included cutting the pieces for the pouches.
I had just been given a large bag of scraps of which included this
denim looking print that I thought would work for both boys and girls.
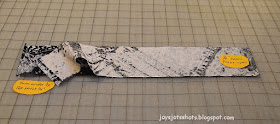
One end of the 2 pieces were sewn together and the other ends turned under and stitched.
The stitched ends were overlapped
with right sides together as shown.
Each long side was stitched by machine.
Through the small opening, the piece was turned right side out.
A long knitting needle helped.
Marked button.
The very first lesson for students was
threading and knotting a hand needle.
The second lesson was sewing on a button.
In this case it was a 4 hole button.
After the button was sewn,
I marked where the button hole should be placed.
Students were shown how to make a buttonhole
using the buttonhole attachment
on my Brother machine.
This included using the attachment to
determine size of button, which is not shown here,
and setting up the machine.
(Above is the attachment for a Singer Quantum from the 90s)
It took about 6 class sessions to rotate all 12 students through
the one machine I had available to make a buttonhole.
Meanwhile,
I had had folded the piece and made a couple of hand stitches on one side
to start the "Whip Stitch" that was to be used down both sides.
As a student was waiting to make their buttonhole,
they could go ahead and whip stitch down the sides by hand.
The student could pause the whip stitch
and add the buttonhole at any time.
After all the Tuesday & Thursday 50 minute classes in September,
I'm happy to say all students finished their
Pencil Pouch!
******************
You may find this post at several Linky Parties. Please check them out for some great ideas.
Thanks to
GIMP for cropping & other digital effects
PicMonkey creating collages used on this page
Photoscape for downsizing & watermarking photo


No comments:
Post a Comment
Have a JOYful day!
Leave a comment or an email if you like.
I will enJOY either.
Please LEAVE YOUR EMAIL ADDRESS if you need a reply.