12 inch block
The smaller square's side needs to be half the side of the larger square's side plus seam allowance.
So for a finished 4 inch square(with added 1/2in seam allowance)
cut a 2 inch square and add the 1/2 inch seam allowance.

Even though I had the square marked, I still paid attention to the Angler 2 marks.
Glad I did, because it turned out these pieces need to be accurate in order to match up later.
cut a 2 inch square and add the 1/2 inch seam allowance.

Use favorite method to mark 1 diagonal on the small squares.
Depending on the fabric, ironing can work.
An IKEA gel pen marks fabric well without pulling or stretching it.
It does run, so don't use steam.
The line will be cut away later, so no worries about future problems.
Or use an Angler 2.
I know I have too much stuff, because I forgot about this souvenir I bought coming back from our Route 66 trip 2 years ago.
on our beeline trip home & I bought the Angler 2 as a souvenir.
It was the only sewing souvenir I bought on the 19 day trip.
I could have pulled out this thing many times before now and don't know why I didn't.Even though I had the square marked, I still paid attention to the Angler 2 marks.
So I WILL be using this more often.
The problem was the line wore away quickly.
I've seen some use tape to mark the line.
Sew squares on opposite corners.
Trim leaving a 1/4 inch seam allowance.
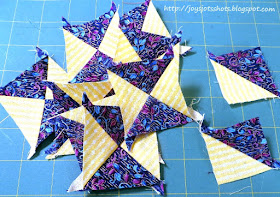
For faster cutting, line up 2 squares as you see here.
I can't stand to throw descent size scraps away.
So, while I was at it, I combined them.
All squares are placed in same direction.
I love the warped star you see in the center.
Looks like it wasn't just squares that were used to make the block.
Does the warped star get lost?
While it is by far not an Autostereogram,
I do have to make my eyes focus for a minute to see all the warped stars.
With a border.
When adding the sashing using Intervals in Photoscape, I have found the "FRAME" botton has lots of decorative options that give the feel of multiple fabrics.
Find out how I used free PhotoScape to show this block in a quilt
*********************
Thanks to the FREE programs:
Photoscape for downsizing & watermarking photo
PicMonkey creating collages used on this page


I love it! (Though I'm feeling a bit cross-eyed now!) :)
ReplyDelete